Overview
BeyondKode is a multilingual end to end single sign on platform that businesses can use to create digital apps/webs, workflows, and processes 10x faster (using the concept of rapid development), in a more efficient and effective manner. It enables full-stack visual development through drag-and-drop functionality, encompassing UI design, business workflows, logic, and data models. Additionally, users can incorporate custom code and import modules, allowing for flexibility and extensibility.
The platform supports the development of enterprise-grade applications using an Integrated Development Environment (IDE) and facilitates deployment either on-premises, in the cloud, or both. It caters to various devices, including desktops, tablets, and mobiles. One of BeyondKode’s key features is its integration capabilities, allowing seamless connectivity with external enterprise systems, databases, or custom applications through pre-built connectors, core system services, and APIs. In addition, the platform’s low-code nature significantly reduces coding efforts, enabling faster business transformations. It empowers business users to collaborate with IT seamlessly, extending and enriching off-the-shelf applications or building new solutions to enhance business efficiency and drive better results rapidly.
Users have the flexibility to build applications either UI-first or Data-first, utilizing a visually based interface designer to construct UI elements, workflows, and services. They can easily wire up data sources, selecting from a catalog of built-in REST services or data objects, and seamlessly publish their apps with one-click deployment to staging, testing, and production environments. Furthermore, BeyondKode facilitates real-time testing during the development process, allowing users to toggle between design and preview modes to assess functionality as they build. This feature ensures the quality of the final product.
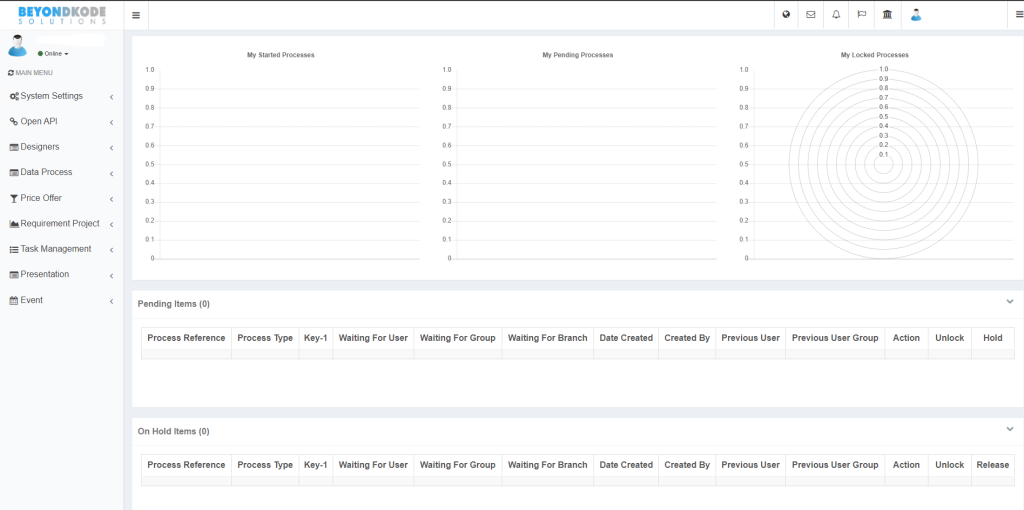
Upon logging in, the user will first see the Main page, which varies depending on the user’s account permissions (e.g., Admin, user, etc.). This page includes the Main Menu, Processes status (Started, Pending, On Hold), Notifications, Messages, and a Language Switcher icon. In the top right corner, the username, Notifications, Messages, and Language Switcher icons are displayed.
Main Menu Fields:
1. System Settings:
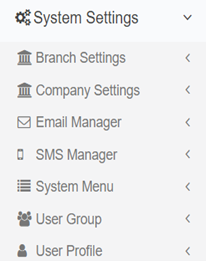
- In branch settings: user can view or amend different inserted branches, also he can Insert a new branch.
- In Company settings: user can view or amend different inserted Companies, also he can Insert a new Company.
- Email Manager.
- SMS Manager.
- User profile: To add new users to the platform or Amend the information for an existing user.
- System Menu: In this Field we can add new fields to the main menu.
- To Insert new System Menu, do the following:
– From System Menu, click on new System Menu.
– Enter Menu name, Title, and Icon. Parent Menu Name (In it add the parent menu and it is optional).
– Menu Item Details: Item Id (The version name that user already created).
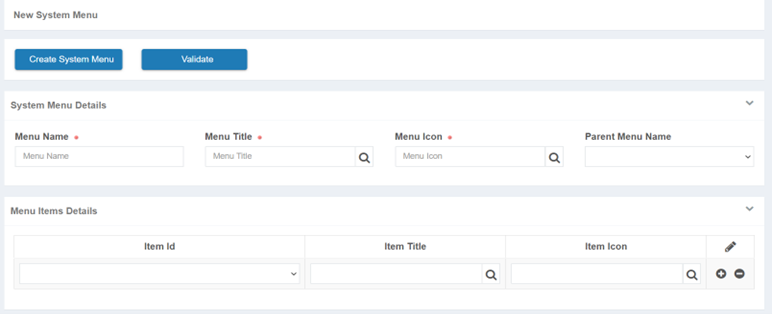
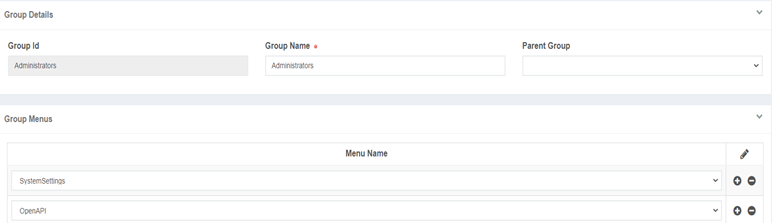
- After creating new System Menu, to show it in the main menu.
– From System settings go to User Group, Select Amend User Group.
– From User Group Items select Administrator, Click on Amend button the following screen will appear, From it in Group Menus section add the new System Menu.
2. Open APIs:
- At first how to create a new API is explained in section 6.3. Open APIs section has two options:
– API Proxy Requests.
– API Requests.
3. Designers:
- From it we can go to the Version Designer, which is described in section 2.
4. Data process.
The platform has Version designer in Home Menu. From Main page Menu Click on Designers and choose Version Designer. In Version Designer the scripting functionalities, including backend codes, and incorporating UI design are encompassed.
important note after making any new version do not forget to save it using Save Version Icon from home Menu, because there is no auto save. And to open any existing Version just search for it in the Open Version Icon.
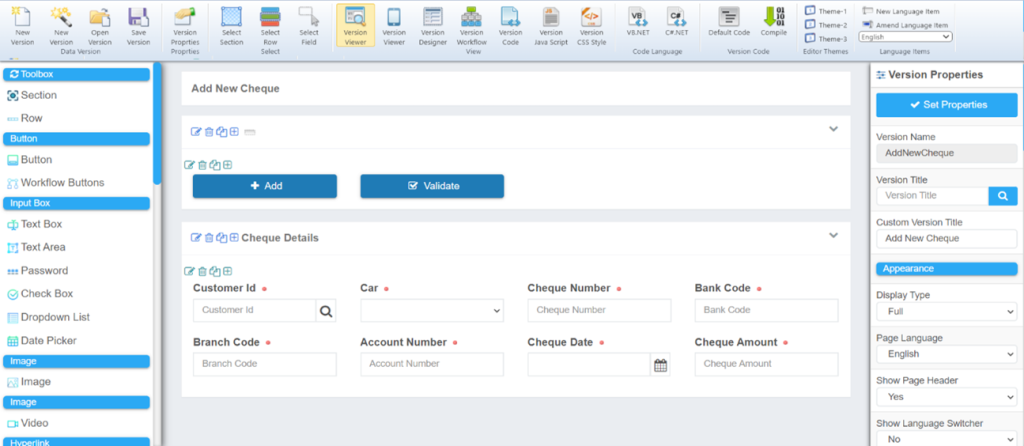
Version Properties #
Each version has different properties if the user wants to view them. First, click on Version Viewer, it is in the Home menu bar. There are a lot of properties like:
- Version title.
- Display type (Full / Wizard).
- Show page header if yes language Switcher can be shown Including (English, Arabic, or any other language you want).
– If user wants to add another language it is explained in section 5.1. - Logo or Icon for the header.
- Change color of background or text for header. CSS code can be written and put into the header, the code will be called in Header CSS Class or Header style sections. To call it user only needs to put the function name in Header CSS Class or Header style.
– Everything for the CSS code is explained in section 2.6. - Show navigation menu (Yes / No): If yes, it will be displayed only if the Display type is Wizard.

- Is Data Process, if yes, the process type can be chosen for data processing. after creating it.
– How to create process It is explained in section 5.4. - On Load Function: In this field, the initial function for the selected version to start with, can be called by the user, and it is optional. For example, Version has a function called OnLoad, if user wants to make it the start function, he must call it in On Load Function in the Version properties in this way: @(function name), so it will be @OnLoad.
Section and Row #
BeyondKode gives many tools and fields for making a project. To use any field first put section, initially there is row in it if not put row, then you can drag and drop any field you want inside the row:

Section #
General notes about the section:
- Maximum width is 12 for each section.
- Section header including title can be visible or hidden.
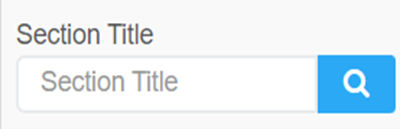
- If Section header is Visible, user can change the section title from Section Properties If the title language wants to be changed depending on the chosen language in the language switcher is preferred, do the following:
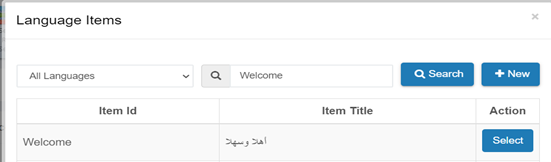
– From Home menu bar click on new language item.
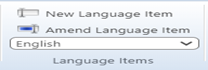
– After that, A screen will appear as shown in the following figure:
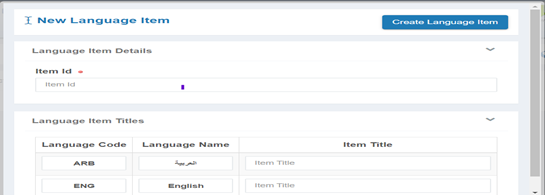
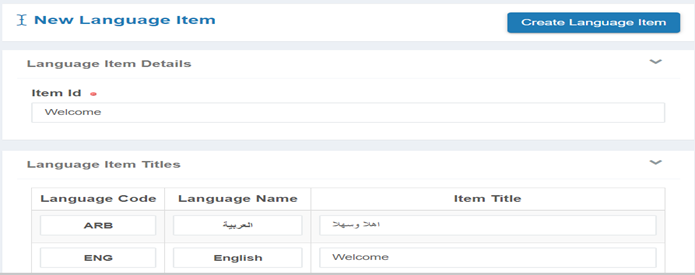
– Item Id must be without spaces if it is more than one word, for example, put Item Id to be Welcome, then fill all information. Since two
main languages, Arabic and English, have been added, they will be only filled, if platform has more, user can use them.
– Finally, click on Create language item.
– Now a new language has been created, to put it in the Section. From Section Properties click on the search icon in section title:
– Search for language item using the Item Id and select the item you already made.
– Finally, click on Set properties, then Section Title will be changed depending on the Version language.
- Section visibility: means the operation of the whole Section not only on the title as in show section header. Section visibility has many options including:
– Visible.
– Always visible: If the screen is Wizard, the difference here that the section will be always visible and stay in the main page even the display type is Wizard, but in visible option if the type is Wizard the section will be hidden or visible depending on its location or order.
– Hidden: Means the section will be hidden and you can make it visible depending on the code different conditions.
– Popup dialog: It shows the section as Popup, to make it do the following:
• First, Popup needs code and button to make it, so first put button, from its properties there is box called Onclick, the function that is written in the code for Popup should be called in the OnClick box.
• Assume there is function its name is ShowPopup, call it in the button OnClick box as shown in the next figure.

• For the Popup, two functions are available.

• In Section Name write the name of the Section (you can get it from Section Properties) that user wants to be shown as Popup, but first in Section Properties the Section Visibility must be Popup.
• The difference between Show and Show dialog is that when using Show function, it gives the user the option to exit popup page when tapping anywhere on the screen outside popup page. On the other hand, ShowDialog means the user cannot exit the popup page unless the user clicks ones the X sign in the popup page.
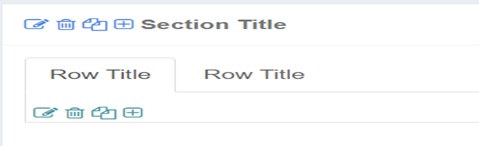
- Display type: It can be either Normal or Tabs. If Tabs the Row will be shows like this:
- In Properties if Collapsible is Yes, then the Section will be collapsible content.
- CSS code can be written and applied to the Section or Section header by entering the function name in the Header CSS Class, Header style, or Section CSS Class sections.
Row #
As we said before, inside each Section user must put Rows because inside them the fields will be dragged. You can view all Row properties when clicking on it or in edit pen. Some Row properties like, Row Layout (Horizontal or Vertical), CSS code, Row Visibility, Row Type, Show Multi-Value Header including showing add and remove buttons …. etc.
Fields #
The platform gives the user opportunity to make any design he wants depending on different fields in it, for example, buttons, text box, text area, check box, dropdown list, Image, Video, Chart… Etc. Inside each section you can put different fields. Each field has its own properties; to view them after clicking on the field or in edit pen. The platform fields are:
- Button field different properties:
– Field title can be changed from Custom Field Title (In this case the title will appear as what we wrote and will not change to another language if we changed the language). But in Field title the title will change depending on the selected language in language switcher. How to add item with different language and how to add it to the title is previously explained in 2.2.1 section title, the only difference is the box called (Field title).

– Field Full Width (Maximum width is 12).
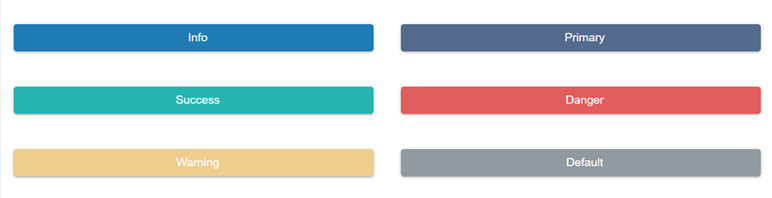
– Button Main Class: the button can be:
• Info.
• Primary.
• Success.
• Danger.
• Warning.
• Default.
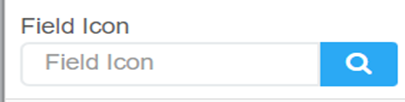
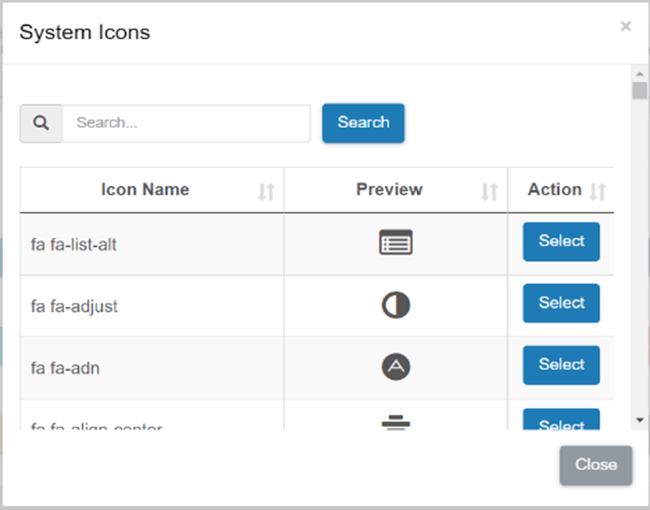
– Button Icon: for example, user wants to put Icon for the danger button. So, from Field Icon box click on search Icon and choose any Icon from the list. After that, click on Set properties to save the new button property.
– Control CSS Class.
– Comment for the button: As information to explain what this button does. Go to Comment header and Comment body boxes, the following figure shows the comment and the new icon for the danger button and how the comment will be displayed:

– Link URL: A link can be included so that when the user clicks on the button, he will be directed to the URL specified in the Link URL box.
– OnClick: In this field any function written in the code can be called, so when the user clicks on the button the called function will be used. @(function name) this how we put the function name inside OnClick box.
– Field Status (Enabled or Disabled).
– Field Visibility (Visible or Hidden).
– Custom actions: If the screen is Wizard, custom action contains wizard next, wizard back, and validate fields (used for validating all fields in the screen).
- Text box different properties:
– Field title can be changed from Custom Field Title (In this case the title will appear as what we wrote and will not change to another language if we changed the language). But in Field title the title will change depending on the selected language in language switcher.
– Field Full Width (Maximum width is 12).
– Field Value: In this box we can put initial value to be shown in the text box.

– Is Multi Value: If yes, user can:
• set Max Multi Value Fields from the properties.
• Show Multi-Value Add Button.
• Show Multi-Value Remove Button.

– Min & Max Data Length: The Min Data Length feature helps enforce field requirements; for instance, if the Min Data Length is set to 5, inputs with fewer than 5 characters will be rejected. To be sure the field is now mandatory next to it will appear red circle:

– Split input: For example, ID number, phone number. Note that: Min & Max Data Length must be the same number. In the following example both Min & Max are 10.

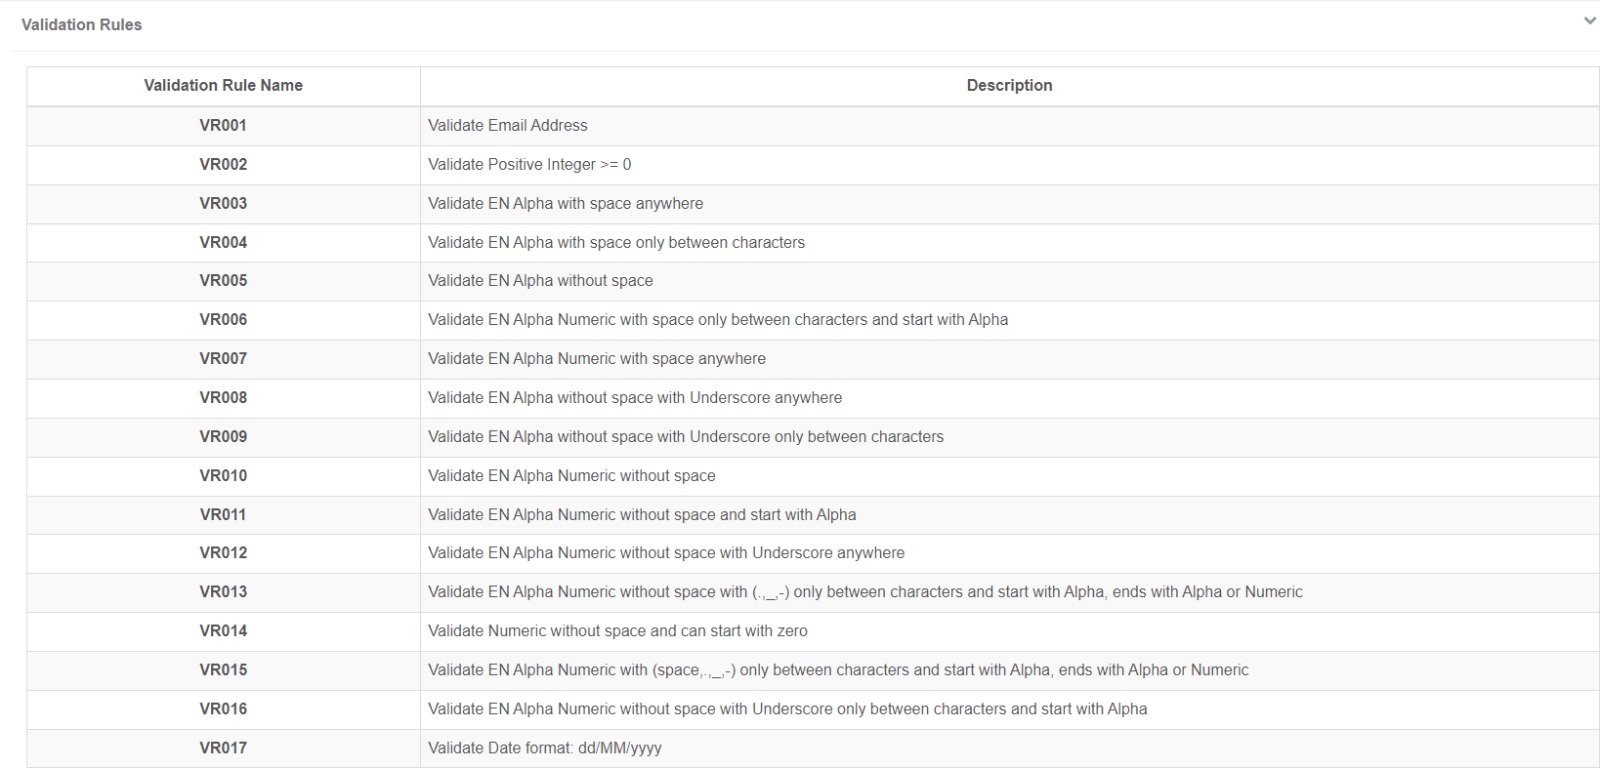
– Validation Rule: The platform contains 34 main Validation Rules. To see them and what each number of Validation mean:
• Go to Settings.
• From the Settings Menu bar click on View Help, in it you can see all validation rules.
• The following figure shows the validation rules and their descriptions.
– Missing Input Error: The error message displayed can be chosen for two scenarios: if the text box is empty or if the entered length in the text box is less than the specified minimum length when it is mandatory.
– Invalid Input Error: It is used if the user chooses Validation rule so Invalid Input Error show error message if the entered value is not valid.
– Control CSS Class, Label Style.
– Field Icon: for example, user wants to put Icon for the text box. So, from Field Icon box click on search Icon and choose any Icon from the list. After that, click on Set properties to save the new property.
– OnClick or OnChange: In this field we can call the function from the code we write, so when the user clicks on the field the called function will be used. @(function name) this how we put the function name inside OnClick box.
– Placeholder & Custom Placeholder: It is used to give an example of what must be written in the field. The difference is that in Custom Placeholder you only put one language, but in Placeholder the written sentence will be changed depending on the selected language.

– Field Status (Enabled or Disabled).
– Field Visibility (Visible or Hidden).
- Text Area different properties: Text Area has the same properties as the Text Box, the only new thing that:
– Number of Rows: In this box you can choose the number of rows (Lines) of the Text Area.
- Password different properties: Password has the same properties as the Text Box the only difference in does not have Field Icon.
- Check Box different properties: Same main properties as title, Width, CSS, Status, Visibility, the new properties are:
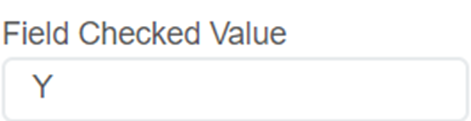
– Field Checked Value: Means if the check box is checked what the value will be, for example: YES so, we put Y.
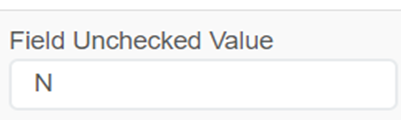
– Field Unchecked Value: Means if the check box is Unchecked what is the value will be, for example: No so, we put N.
– Check Box Type: Can be, Normal, Toggle, Radio.

- Dropdown List different properties: Same main properties as title, Width, CSS, Status, Visibility, the new properties are:
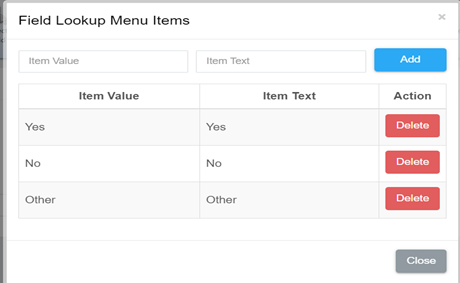
– To add values to the drop-down list, from Properties click on Lookup Menu Items.
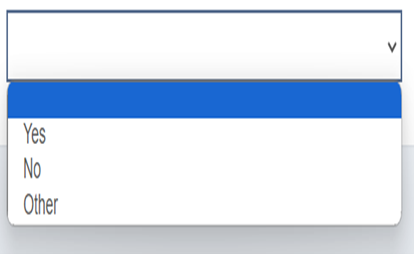
– Inside it we can add different items, for example add Yes, No, Other, you can add by entering item value as Id and item text how the item will be displayed in the drop-down list.
There is another way to generate lookup menu for different languages using database, it will be explained in section 6.2.
- Date Picker different properties: Date Picker has the same properties as the Text Box the only difference in does not have Field Icon.
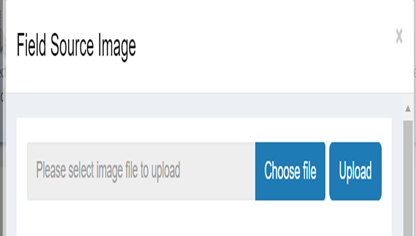
- Image different properties:
– To add a photo, first from properties choose Source Image, then click on choose file, this step is important to add Image from the device to the platform. Finally, choose the Image and upload it after it is added to the platform gallery.
- Video different properties: To add video it is the same way as the Image. The new properties for the video are:
– Show Video Controls: Yes or No.
– Auto Play Video: Yes or No.
- File Box different properties: For download or upload files. We can set the allowed file types, and the allowed max file size. Allow Image Cropping is available if we want to upload image.
- Chart different properties:
– Chart Type: Bar, Horizontal Bar, Line, Radar, Pie, Doughnut, and Polar Area.
– Refresh Interval (Second).
- Static HTML Plugin: We can Amend HTML code in it.
Scripting (Vb.Net/C#.Net) & Platform Main Functions #
This platform allows writing code using either VB.NET or C#.NET. In the version designer click on Default code from Home Menu bar, then you can choose VB.NET or C#.NET.
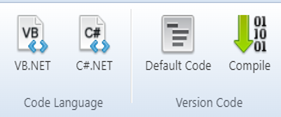
– Compile Icon is used to make build for the code.
– If you want to show all platform main functions, click on (Ctrl + Space).
– Important note: if using C# code when you use any function, for example field visibility function, it will be written like this:
(objDataProcess.Field("FieldName_0").FieldVisibility) You must change ("FieldName_0") to ["FieldName_0"]because the platform initially assumes the code is VB. So, we will change () to [].
– To make try and catch use the following code:
try {
      //your code
} catch (Exception e){
      objDataProcess.ProcessDataVersion.ErrorAlerts.Add(e.Message);
}
Syntax Highlighting Patterns and Keywords #
- var singleOperators = new RegExp(“^[\\+\\-\\*/%&\\\\|\\^~<>!]”);
- var singleDelimiters = new RegExp(‘^[\\(\\)\\[\\]\\{\\}@,:`=;\\.]’);
- var doubleOperators = new RegExp(“^((==)|(<>)|(<=)|(>=)|(<>)|(<<)|(>>)|(//)|(\\*\\*))”);
- var doubleDelimiters = new RegExp(“^((\\+=)|(\\-=)|(\\*=)|(%=)|(/=)|(&=)|(\\|=)|(\\^=))”);
- var tripleDelimiters = new RegExp(“^((//=)|(>>=)|(<<=)|(\\*\\*=))”);
- var identifiers = new RegExp(“^[_A-Za-z][_A-Za-z0-9]*”);
- var keywords = wordRegexp(commonKeywords);
- var types = wordRegexp(commontypes);
- var stringPrefixes = ‘”‘;
- var opening = wordRegexp(openingKeywords);
- var middle = wordRegexp(middleKeywords);
- var closing = wordRegexp(endKeywords);
- var doubleClosing = wordRegexp([‘end’]);
- var doOpening = wordRegexp([‘do’]);
- var indentInfo = null;
- var openingKeywords = [‘Namespace’, ‘class’, ‘module’, ‘sub’, ‘enum’, ‘select’, ‘for’, ‘while’, ‘if’, ‘function’, ‘get’, ‘set’, ‘property’, ‘try’];
- var middleKeywords = [‘else’, ‘elseif’, ‘case’, ‘catch’];
- var endKeywords = [‘next’, ‘loop’]
- var operatorKeywords = [‘and’, ‘or’, ‘not’, ‘xor’, ‘in’];
- var wordOperators = wordRegexp(operatorKeywords);
- var commonKeywords = [‘as’, ‘dim’, ‘break’, ‘continue’, ‘optional’, ‘then’, ‘until’, ‘goto’, ‘byval’, ‘byref’, ‘new’, ‘handles’, ‘property’, ‘return’, ‘const’, ‘private’, ‘protected’, ‘friend’, ‘public’, ‘shared’, ‘static’, ‘true’, ‘false’];
- var commontypes = [‘integer’, ‘string’, ‘double’, ‘decimal’, ‘boolean’, ‘short’, ‘char’, ‘float’, ‘single’, ‘object’, ‘exit for’, ‘exit sub’, ‘exit function’, ‘exit property’, ‘exit do’, ‘exit while’, ‘exit select’, ‘exit try’];
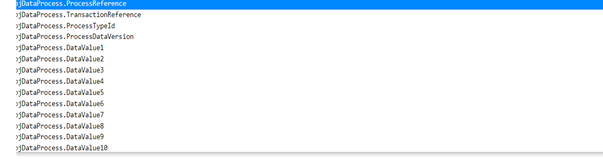
Main Functions #
- objDataProcess.ProcessReference.
- objDataProcess.TransactionReference
- objDataProcess.ProcessTypeId
- objDataProcess.ProcessDataVersion
- objDataProcess.DataValue1………. 20
- objDataProcess.CurrentNodeName
- objDataProcess.CurrentNodeType
- objDataProcess.ActionTaken
- objDataProcess.ActionNotes
- objDataProcess.ActionTakenBy
- objDataProcess.WaitingForUser
- objDataProcess.WaitingForUserGroup
- objDataProcess.WaitingForBranch
- objDataProcess.ActionStartDateTime
- objDataProcess.ActionCompleteDateTime
- objDataProcess.ProcessDateCreated
- objDataProcess.ProcessCreatedBy
- objDataProcess.ProcessStatus [Started/Pending/Cancelled/InProgress/Completed]
- objDataProcess.ProcessLockedFor
- objDataProcess.IsOnHold’,
- objDataProcess.PreviousUser
- objDataProcess.PreviousUserGroup
- objDataProcess.PreviousBranch
- objDataProcess.RenderDataVersionAfterWorkflowComplete = False
- objDataProcess.StartupScript
- objDataProcess.SelectedFieldName
- objDataProcess.SelectedFieldIndex
- objDataProcess.AddedRowIndex
- objDataProcess.CurrentProcessSessionId
- objDataProcess.PageRequest
- ‘objDataProcess.PageLanguage
- ‘objDataProcess.PageDirection
- ‘objDataProcess.GetParam(“ParamName”) As String
- ‘objDataProcess.DoWizardBack()
- ‘objDataProcess.BuildDictionary()
- ‘objDataProcess.UpdateTransactionReference(objEnvironment.CompanyId,objEnvironment.UserId) As ActionResult
- objDataProcess.GetCountByTransactionReference(objEnvironment.CompanyId,ByVal TransactionReference As String, objEnvironment.UserId) As Integer
- ‘objDataProcess.GetProcessComments(objEnvironment.CompanyId,ByVal ProcessReference As String, objEnvironment.UserId) As String
- ‘objDataProcess.GetProcessFlows(objEnvironment.CompanyId, ByVal ProcessReference As String, objEnvironment.UserId) As String’,
- ‘objDataProcess.SetRadioGroupValue(ByVal RadioGroupName As String, ByVal RadioGroupValue As String) As Boolean’,
- ‘objDataProcess.GetRadioGroupValue(ByVal RadioGroupName As String) As String’,
- ‘objDataProcess.CheckAgainstValidationRule(“StringToCheck”, “ValidationRuleName”) As Boolean’,
- ‘objDataProcess.GetUserProfilePicture(ByVal objUserProfile As UserProfile) As String’,
- ‘objDataProcess.GetUserBranchCode(objEnvironment.CompanyId, ByVal UserId As String) As String’,
- ‘objDataProcess.GetDocument(“DocumentName”, ByRef HasErrors As Boolean, ByRef ErrorDescription As String, objEnvironment) As DocumentFiller’,
- ‘objDataProcess.GenerateWordDocument(“DocumentName”, ByVal DataFields As Dictionary(Of String, String), ByVal DatasetFields As Dictionary(Of String, DataSet), ByVal TargetFieldName As String, ByVal TargetFieldIndex As String, ByRef ErrorDescription As String, objEnvironment) As Boolean’,
- ‘objDataProcess.GetWordDocumentGenerator(“DocumentName”, ByRef HasErrors As Boolean, ByRef ErrorDescription As String, objEnvironment) As WordDocumentGenerator’,
- ‘objDataProcess.SaveGeneratedWordDocument(ByVal objWordDocumentGenerator As Object, ByVal TargetFieldName As String, ByVal TargetFieldIndex As String, objEnvironment) As Boolean’,
- ‘objDataProcess.GetExcelDocumentGenerator(ByRef HasErrors As Boolean, ByRef ErrorDescription As String) As ExcelDocumentGenerator’,
- ‘objDataProcess.SaveGeneratedExcelDocument(ByVal objExcelDocumentGenerator As Object, ByVal ExcelDocumentName As String, ByVal TargetFieldName As String, ByVal TargetFieldIndex As String, ByRef objEnvironment As EnvironmentVariables) As Boolean’,
- ‘objDataProcess.ShowDocument(ByVal objDocument As Object, ByVal TargetFieldName As String, ByVal TargetFieldIndex As String)’,
- ‘objDataProcess.ShowDocument2(ByVal objDocument As Object, ByVal TargetFieldName As String, ByVal TargetFieldIndex As String)’,
- ‘objDataProcess.SaveVersionDataMapping(“MappingName”) As ActionResult
- ‘objDataProcess.AmendVersionDataMapping(“MappingName”) As ActionResult
- ‘objDataProcess.DeleteVersionDataMapping(“MappingName”) As ActionResult
- ‘objDataProcess.ExecuteBusinessRule(ByVal BusinessRuleName As String) As String
- ‘objDataProcess.SetGlobalValue(“Key”,ByVal Value As Object) As Boolean
- ‘objDataProcess.GetGlobalValue(“Key”) As Object
- ‘objDataProcess.Show(“SectionName”)’,
- ‘objDataProcess.ShowDialog(“SectionName”)’,
- ‘objDataProcess.OpenPopup(ByVal URL As String)’,
- ‘objDataProcess.OpenVersionPopup(ByVal VersionName As String, ByVal ExtraParams As String)’,
- ‘objDataProcess.Redirect(“URL”)’];
Data Version Main Functions #
- ‘objDataProcess.ProcessDataVersion.VersionName’,
- ‘objDataProcess.ProcessDataVersion.VersionTitle’,
- ‘objDataProcess.ProcessDataVersion.CustomVersionTitle’,
- ‘objDataProcess.ProcessDataVersion.DisplayType [Wizard/Full]’,
- ‘objDataProcess.ProcessDataVersion.PageLanguage’,
- ‘objDataProcess.ProcessDataVersion.ShowHeader [Y/N]’,
- ‘objDataProcess.ProcessDataVersion.ShowLanguageSwitcher [Y/N]’,
- ‘objDataProcess.ProcessDataVersion.HeaderIcon’,
- ‘objDataProcess.ProcessDataVersion.HeaderLogo’,
- ‘objDataProcess.ProcessDataVersion.HeaderForeColor’,
- ‘objDataProcess.ProcessDataVersion.HeaderBackColor’,
- ‘objDataProcess.ProcessDataVersion.HeaderStyle’,
- ‘objDataProcess.ProcessDataVersion.HeaderClass’,
- ‘objDataProcess.ProcessDataVersion.ShowActionNotes [Y/N]’,
- ‘objDataProcess.ProcessDataVersion.ShowNavigationMenu [Y/N]’,
- ‘objDataProcess.ProcessDataVersion.NavigationMenuWidth’,
- ‘objDataProcess.ProcessDataVersion.NavigationMenuStyle’,
- ‘objDataProcess.ProcessDataVersion.ShowProgressBar [Y/N]’,
- ‘objDataProcess.ProcessDataVersion.ProgressBarBackColor’,
- ‘objDataProcess.ProcessDataVersion.OnLoadFunction’,
- ‘objDataProcess.ProcessDataVersion.OnPostBackFunction’,
- ‘objDataProcess.ProcessDataVersion.ValidationFunction’,
- ‘objDataProcess.ProcessDataVersion.BeforeSubmitFunction’,
- ‘objDataProcess.ProcessDataVersion.AfterSubmitFunction’,
- ‘objDataProcess.ProcessDataVersion.LanguageChangedFunction’,
- ‘objDataProcess.ProcessDataVersion.VersionSections’,
- ‘objDataProcess.ProcessDataVersion.Tag1 ……… 10’,
- ‘objDataProcess.ProcessDataVersion.ALTag1 . ………. 10 ‘,
- ‘objDataProcess.ProcessDataVersion.SelectedSectionName’,
- ‘objDataProcess.ProcessDataVersion.SuccessAlerts’,
- ‘objDataProcess.ProcessDataVersion.InfoAlerts’,
- ‘objDataProcess.ProcessDataVersion.WarningAlerts’,
- ‘objDataProcess.ProcessDataVersion.ErrorAlerts’,
- ‘objDataProcess.ProcessDataVersion.ValidationResult’,
- ‘objDataProcess.ProcessDataVersion.IsFirstWizardSection’,
- ‘objDataProcess.ProcessDataVersion.IsLastWizardSection’,
- ‘objDataProcess.ProcessDataVersion.AddMultiValueGroupRow(“RowName”, ByVal FieldGroupRowIndex As Integer) As VersionRow’,
- ‘objDataProcess.ProcessDataVersion.RemoveMultiValueGroupRow(“RowName”, ByVal FieldGroupRowIndex As Integer) As VersionRow’,
- ‘objDataProcess.ProcessDataVersion.AddMultiValueField(“FieldName”, ByVal FieldIndex As Integer) As Boolean’,
- ‘objDataProcess.ProcessDataVersion.RemoveMultiValueField(“FieldName”, ByVal FieldIndex As Integer) As Boolean’,
- ‘objDataProcess.ProcessDataVersion.AddCustomMultiValueField(“FieldName”, ByVal ShowMultiValueAddButton As String, ByVal ShowMultiValueRemoveButton As String, ByVal FieldStatus As String) As Boolean’,
- ‘objDataProcess.ProcessDataVersion.ClearMultiValueField(“FieldName”, Optional ByVal ClearFirstFieldValue As Boolean = False) As Boolean’,
- ‘objDataProcess.ProcessDataVersion.MultiValueFieldDuplicateValues(“FieldName”) As Boolean’,
- ‘objDataProcess.ProcessDataVersion.MultiValueFieldsDuplicateValues(ByVal ParamArray FieldNames As String()) As Boolean’,
- ‘objDataProcess.ProcessDataVersion.GetMultiValueFieldCount(“FieldName”) As Integer’,
- ‘objDataProcess.ProcessDataVersion.GetSection(ByVal SectionName As String, ByRef IsFound As Boolean) As VersionSection’,
- ‘objDataProcess.ProcessDataVersion.GetRow(ByVal RowName As String, ByRef IsFound As Boolean) As VersionRow’,
- ‘objDataProcess.ProcessDataVersion.GetField(ByVal FieldName As String, ByVal FieldIndex As Integer, ByRef IsFound As Boolean) As VersionField’,
- ‘objDataProcess.ProcessDataVersion.ValidateVersionFields(objEnvironment.CompanyId, objDataProcess, objEnvironment, ByRef ValidationResults As List(Of String), objEnvironment.UserId) As Boolean’,
- ‘objDataProcess.ProcessDataVersion.AddSuccessAlert(objEnvironment.CompanyId, ByVal ItemId As String, objDataProcess.PageLanguage, objEnvironment.UserId)’,
- ‘objDataProcess.ProcessDataVersion.AddInfoAlert(objEnvironment.CompanyId, ByVal ItemId As String, objDataProcess.PageLanguage, objEnvironment.UserId)’,
- ‘objDataProcess.ProcessDataVersion.AddWarningAlert(objEnvironment.CompanyId, ByVal ItemId As String, objDataProcess.PageLanguage, objEnvironment.UserId)’,
- ‘objDataProcess.ProcessDataVersion.AddErrorAlert(objEnvironment.CompanyId, ByVal ItemId As String, objDataProcess.PageLanguage, objEnvironment.UserId)’,
- ‘objDataProcess.ProcessDataVersion.SetWorkflowNodeCaseStatus(ByVal NodeName As String, ByVal CaseValue As String, ByVal CaseStatus As String) As Boolean’,
- ‘objDataProcess.ProcessDataVersion.EnableField(ByVal FieldName As String, ByVal FieldIndex As String) As Boolean’,
- ‘objDataProcess.ProcessDataVersion.DisableField(ByVal FieldName As String, ByVal FieldIndex As String) As Boolean’,
- ‘objDataProcess.ProcessDataVersion.SetMultiValueFieldButtons(ByVal FieldName As String, ByVal FieldIndex As String, ByVal ShowAddButton As String, ByVal ShowRemoveButton As String) As Boolean’,
- ‘objDataProcess.ProcessDataVersion.EnableRowFields(ByVal RowName As String) As Boolean’,
- ‘objDataProcess.ProcessDataVersion.DisableRowFields(ByVal RowName As String) As Boolean’,
- ‘objDataProcess.ProcessDataVersion.SetMultiValueGroupButtons(ByVal RowName As String, ByVal ShowAddButton As String, ByVal ShowRemoveButton As String) As Boolean’,
- ‘objDataProcess.ProcessDataVersion.EnableSectionFields(ByVal SectionName As String) As Boolean’,
- ‘objDataProcess.ProcessDataVersion.DisableSectionFields(ByVal SectionName As String) As Boolean’,
- ‘objDataProcess.ProcessDataVersion.EnableAllFields() As Integer’,
- ‘objDataProcess.ProcessDataVersion.DisableAllFields() As Integer’,
- ‘objDataProcess.ProcessDataVersion.SaveAllFieldsStatus() As Integer’,
- ‘objDataProcess.ProcessDataVersion.ReverseAllFieldsOldStatus() As Integer’];
Section Main Functions #
- objDataProcess.Section(“SectionName”).SectionName’,
- ‘objDataProcess.Section(“SectionName”).SectionTitle’,
- ‘objDataProcess.Section(“SectionName”).CustomSectionTitle’,
- ‘objDataProcess.Section(“SectionName”).DisplayType [Normal/Tabs]’,
- ‘objDataProcess.Section(“SectionName”).ShowHeader [Y/N]’,
- ‘objDataProcess.Section(“SectionName”).Collapsible [Y/N]’,
- ‘objDataProcess.Section(“SectionName”).SectionWidth [1/2/3/4/5/6/7/8/9/10/11/12]’,
- ‘objDataProcess.Section(“SectionName”).SectionStyle’,
- ‘objDataProcess.Section(“SectionName”).SectionClass’,
- ‘objDataProcess.Section(“SectionName”).SectionContainerStyle’,
- ‘objDataProcess.Section(“SectionName”).HeaderForeColor’,
- ‘objDataProcess.Section(“SectionName”).HeaderBackColor’,
- ‘objDataProcess.Section(“SectionName”).HeaderStyle’,
- ‘objDataProcess.Section(“SectionName”).HeaderClass’,
- ‘objDataProcess.Section(“SectionName”).BodyBackColor’,
- ‘objDataProcess.Section(“SectionName”).BodyStyle’,
- ‘objDataProcess.Section(“SectionName”).BodyClass’,
- ‘objDataProcess.Section(“SectionName”).ValidationFunction’,
- ‘objDataProcess.Section(“SectionName”).ValidationResult’,
- ‘objDataProcess.Section(“SectionName”).ActiveTabRowName’,
- ‘objDataProcess.Section(“SectionName”).Tag1 ….. 10’,
- ‘objDataProcess.Section(“SectionName”).ALTag1 …….. 10’,
- ‘objDataProcess.Section(“SectionName”).ValidateWhenHidden [Y/N]’,
- ‘objDataProcess.Section(“SectionName”).SectionVisibility [AlwaysVisible/Visible/Hidden/Popup]’,
- ‘objDataProcess.Section(“SectionName”).SectionLayout [Visible/Hidden]’,
- ‘objDataProcess.Section(“SectionName”).GetField(ByVal FieldName As String, ByVal FieldIndex As Integer, ByRef IsFound As Boolean) As VersionField’];
Row Main Functions #
- var VersionRowProps = [‘objDataProcess.Row(“RowName”).RowName’,
- ‘objDataProcess.Row(“RowName”).RowTitle’,
- ‘objDataProcess.Row(“RowName”).CustomRowTitle’,
- ‘objDataProcess.Row(“RowName”).DisplayAsTab [Y=Yes/NB=No-Display Before Tabs/NA=No-Display After Tabs]’,
- ‘objDataProcess.Row(“RowName”).RowLayout [V=Vertical/H=Horizontal]’,
- ‘objDataProcess.Row(“RowName”).RowVisibility [Visible/Hidden]’,
- ‘objDataProcess.Row(“RowName”).RowType [N=Normal/M=Multi-Value Group Table/F=Multi-Value Group Form]’,
- ‘objDataProcess.Row(“RowName”).ShowMultiValueGroupHeader [Y/N]’,
- ‘objDataProcess.Row(“RowName”).ShowMultiValueGroupAddButton [Y/N]’,
- ‘objDataProcess.Row(“RowName”).ShowMultiValueGroupRemoveButton [Y/N]’,
- ‘objDataProcess.Row(“RowName”).MaxMultiValueGroupRows’,
- ‘objDataProcess.Row(“RowName”).WrapText [Y/N]’,
- ‘objDataProcess.Row(“RowName”).StripedMultiValueGroup [Y/N]’,
- ‘objDataProcess.Row(“RowName”).BorderedMultiValueGroup [Y/N]’,
- ‘objDataProcess.Row(“RowName”).HoverMultiValueGroup [Y/N]’,
- ‘objDataProcess.Row(“RowName”).VerticalAlign [top/bottom/middle]’,
- ‘objDataProcess.Row(“RowName”).RowStyle’,
- ‘objDataProcess.Row(“RowName”).RowClass’,
- ‘objDataProcess.Row(“RowName”).IsTreeTable [Y/N]’,
- ‘objDataProcess.Row(“RowName”).OnAddMultiValueGroupRowFunction’,
- ‘objDataProcess.Row(“RowName”).OnRemoveMultiValueGroupRowFunction’,
- ‘objDataProcess.Row(“RowName”).DisplayType [Row/Section]’,
- ‘objDataProcess.Row(“RowName”).ShowHeader [Y/N]’,
- ‘objDataProcess.Row(“RowName”).Collapsible [Y/N]’,
- ‘objDataProcess.Row(“RowName”).SectionStyle’,
- ‘objDataProcess.Row(“RowName”).SectionClass’,
- ‘objDataProcess.Row(“RowName”).HeaderForeColor’,
- ‘objDataProcess.Row(“RowName”).HeaderBackColor’,
- ‘objDataProcess.Row(“RowName”).HeaderStyle’,
- ‘objDataProcess.Row(“RowName”).HeaderClass’,
- ‘objDataProcess.Row(“RowName”).BodyBackColor’,
- ‘objDataProcess.Row(“RowName”).BodyStyle’,
- ‘objDataProcess.Row(“RowName”).BodyClass’,
- ‘objDataProcess.Row(“RowName”).Tag1 ….. 10’,
- ‘objDataProcess.Row(“RowName”).ALTag1 ….. 10’,
- ‘objDataProcess.Row(“RowName”).ValidateWhenHidden [Y/N]’,
- ‘objDataProcess.Row(“RowName”).HiddenColumns [Names of fields to hide related column delimited by semicolon]’,
- ‘objDataProcess.Row(“RowName”).RowsCount() As Integer’,
- ‘objDataProcess.Row(“RowName”).ColumnsCount() As Integer’,
- ‘objDataProcess.Row(“RowName”).AddMultiValueGroupRow(ByVal FieldGroupRowIndex As Integer)’,
- ‘objDataProcess.Row(“RowName”).RemoveMultiValueGroupRow(ByVal FieldGroupRowIndex As Integer)’,
- ‘objDataProcess.Row(“RowName”).AppendMultiValueGroupRow()’,
- ‘objDataProcess.Row(“RowName”).SetMultiValueGroupRowValues(ByVal RowIndex As Integer, ByVal ParamArray FieldValues As String())’,
- ‘objDataProcess.Row(“RowName”).SetMultiValueGroupRowPluginHTML(ByVal RowIndex As Integer, ByVal ParamArray FieldPluginHTMLs As String())’,
- ‘objDataProcess.Row(“RowName”).ClearRowFieldsValues()’,
- ‘objDataProcess.Row(“RowName”).ClearRowFieldsPluginHTML()’,
- ‘objDataProcess.Row(“RowName”).ClearRowFieldsValuesAndPluginHTML()’,
- ‘objDataProcess.Row(“RowName”).ClearMultiValueGroupRows(Optional ByVal ClearFirstRowValues As Boolean = False)’,
- ‘objDataProcess.Row(“RowName”).ClearMultiValueGroupRows2(Optional ByVal ClearFirstRowPluginHTML As Boolean = False)’,
- ‘objDataProcess.Row(“RowName”).ClearMultiValueGroupRows3(Optional ByVal ClearFirstRowValuesAndPluginHTML As Boolean = False)’,
- ‘objDataProcess.Row(“RowName”).GetField(ByVal FieldName As String, ByVal FieldIndex As Integer, ByRef IsFound As Boolean) As VersionField’];
Fields Main Functions #
- ‘objDataProcess.Field(“FieldName_0”).FieldName’,
- ‘objDataProcess.Field(“FieldName_0”).FieldIndex’,
- ‘objDataProcess.Field(“FieldName_0”).FieldTitle’,
- ‘objDataProcess.Field(“FieldName_0”).CustomFieldTitle’,
- ‘objDataProcess.Field(“FieldName_0”).MultiValueGroupTitle’,
- ‘objDataProcess.Field(“FieldName_0”).CustomMultiValueGroupTitle’,
- ‘objDataProcess.Field(“FieldName_0”).MultiValueGroupWidth’,
- ‘objDataProcess.Field(“FieldName_0”).MultiValueGroupTextAlign [left/center/right]’,
- ‘objDataProcess.Field(“FieldName_0”).LookupMenuName’,
- ‘objDataProcess.Field(“FieldName_0”).IsMultiValue [Y/N]’,
- ‘objDataProcess.Field(“FieldName_0”).ShowMultiValueAddButton [Y/N]’,
- ‘objDataProcess.Field(“FieldName_0”).ShowMultiValueRemoveButton [Y/N]’,
- ‘objDataProcess.Field(“FieldName_0”).MaxMultiValueFields’,
- ‘objDataProcess.Field(“FieldName_0”).MaxDataLength’,
- ‘objDataProcess.Field(“FieldName_0”).MinDataLength’,
- ‘objDataProcess.Field(“FieldName_0”).ValidationRule’,
- ‘objDataProcess.Field(“FieldName_0”).MissingInputError’,
- ‘objDataProcess.Field(“FieldName_0”).CustomMissingInputError’,
- ‘objDataProcess.Field(“FieldName_0”).InvalidInputError’,
- ‘objDataProcess.Field(“FieldName_0”).CustomInvalidInputError’,
- ‘objDataProcess.Field(“FieldName_0”).FieldNumberOfRows’,
- ‘objDataProcess.Field(“FieldName_0”).AllowedFileTypes [e.g.:bmp;jpeg;doc;etc…]’,
- ‘objDataProcess.Field(“FieldName_0”).MaxAllowedFileSize [in KB, if empty then unlimited size]’,
- ‘objDataProcess.Field(“FieldName_0”).AllowImageCropping [Y/N]’,
- ‘objDataProcess.Field(“FieldName_0”).ImageDimensions [WidthXHeight]’,
- ‘objDataProcess.Field(“FieldName_0”).FieldSourceImage’,
- ‘objDataProcess.Field(“FieldName_0”).FieldSourceImageBase64String’,
- ‘objDataProcess.Field(“FieldName_0”).FieldSourceVideo’,
- ‘objDataProcess.Field(“FieldName_0”).ShowVideoControls [Y/N]’,
- ‘objDataProcess.Field(“FieldName_0”).AutoPlayVideo [Y/N]’,
- ‘objDataProcess.Field(“FieldName_0”).Placeholder’,
- ‘objDataProcess.Field(“FieldName_0”).CustomPlaceholder’,
- ‘objDataProcess.Field(“FieldName_0”).FieldFullWidth’,
- ‘objDataProcess.Field(“FieldName_0”).FieldLabelWidth’,
- ‘objDataProcess.Field(“FieldName_0”).FieldControlWidth’,
- ‘objDataProcess.Field(“FieldName_0”).FieldLabelStyle’,
- ‘objDataProcess.Field(“FieldName_0”).FieldLabelClass’,
- ‘objDataProcess.Field(“FieldName_0”).FieldControlStyle’,
- ‘objDataProcess.Field(“FieldName_0”).FieldControlClass’,
- ‘objDataProcess.Field(“FieldName_0”).FieldControlPosition [L/R]’,
- ‘objDataProcess.Field(“FieldName_0”).FieldCheckedValue’,
- ‘objDataProcess.Field(“FieldName_0”).FieldCheckedTitle’,
- ‘objDataProcess.Field(“FieldName_0”).CustomFieldCheckedTitle’,
- ‘objDataProcess.Field(“FieldName_0”).FieldUncheckedValue’,
- ‘objDataProcess.Field(“FieldName_0”).FieldUncheckedTitle’,
- ‘objDataProcess.Field(“FieldName_0”).CustomFieldUncheckedTitle’,
- ‘objDataProcess.Field(“FieldName_0”).CheckBoxType [Normal/Toggle/Radio]’,
- ‘objDataProcess.Field(“FieldName_0”).FieldGroupButtonStyle’,
- ‘objDataProcess.Field(“FieldName_0”).FieldGroupButtonClass’,
- ‘objDataProcess.Field(“FieldName_0”).FieldContainerStyle’,
- ‘objDataProcess.Field(“FieldName_0”).ButtonMainClass [info/primary/success/danger/warning/default]’,
- ‘objDataProcess.Field(“FieldName_0”).FieldCommentHeader’,
- ‘objDataProcess.Field(“FieldName_0”).CustomFieldCommentHeader’,
- ‘objDataProcess.Field(“FieldName_0”).FieldCommentBody’,
- ‘objDataProcess.Field(“FieldName_0”).CustomFieldCommentBody’,
- ‘objDataProcess.Field(“FieldName_0”).FieldPluginHTML’,
- ‘objDataProcess.Field(“FieldName_0”).AutoUpdatePluginHTML [Y/N]’,
- ‘objDataProcess.Field(“FieldName_0”).FieldIcon’,
- ‘objDataProcess.Field(“FieldName_0”).ChartType [bar/horizontalBar/line/radar/pie/doughnut/polarArea]’,
- ‘objDataProcess.Field(“FieldName_0”).ChartFill [Y/N]’,
- ‘objDataProcess.Field(“FieldName_0”).FieldRefreshInterval’,
- ‘objDataProcess.Field(“FieldName_0”).FieldDataSource’,
- ‘objDataProcess.Field(“FieldName_0”).LinkURL’,
- ‘objDataProcess.Field(“FieldName_0”).OnClick’,
- ‘objDataProcess.Field(“FieldName_0”).OnChange’,
- ‘objDataProcess.Field(“FieldName_0”).CustomAction [WizardBack/WizardNext/ValidateFields]’,
- ‘objDataProcess.Field(“FieldName_0”).FieldStatus [Enabled/Disabled]’,
- ‘objDataProcess.Field(“FieldName_0”).FieldOldStatus [Enabled/Disabled]’,
- ‘objDataProcess.Field(“FieldName_0”).FieldVisibility [Visible/Hidden]’,
- ‘objDataProcess.Field(“FieldName_0”).FieldValue’,
- ‘objDataProcess.Field(“FieldName_0”).DataId’,
- ‘objDataProcess.Field(“FieldName_0”).DataParent’,
- ‘objDataProcess.Field(“FieldName_0”).DataLevel’,
- ‘objDataProcess.Field(“FieldName_0”).DataView’,
- ‘objDataProcess.Field(“FieldName_0”).Tag1 …. 10’,
- ‘objDataProcess.Field(“FieldName_0”).ALTag1 …. 10’,
- ‘objDataProcess.Field(“FieldName_0”).ValidateWhenHidden [Y/N]’,
- ‘objDataProcess.Field(“FieldName_0”).OverrideMultiValueGroupButtons [Y/N]’,
- ‘objDataProcess.Field(“FieldName_0”).ShowMultiValueGroupAddButton [Y/N]’,
- ‘objDataProcess.Field(“FieldName_0”).ShowMultiValueGroupRemoveButton [Y/N]’,
- ‘objDataProcess.Field(“FieldName_0”).ValidationResult’,
- ‘objDataProcess.Field(“FieldName_0”).SetDefaults(objEnvironment.CompanyId, objDataProcess.PageLanguage, objEnvironment.UserId)’,
- ‘objDataProcess.Field(“FieldName_0”).SetFieldLanguage(objEnvironment.CompanyId, objDataProcess.PageLanguage, objEnvironment.UserId) As Boolean’,
- ‘objDataProcess.Field(“FieldName_0”).ValidateField(objEnvironment.CompanyId, objDataProcess.PageLanguage, objEnvironment.UserId) As Boolean’,
- ‘objDataProcess.Field(“FieldName_0”).SetFieldError(objEnvironment.CompanyId, ByVal ItemId As String, objDataProcess.PageLanguage, objEnvironment.UserId)’,
- ‘objDataProcess.Field(“FieldName_0”).AddLookupMenuItem(ByVal MenuItemValue As String, ByVal MenuItemText As String)’,
- ‘objDataProcess.Field(“FieldName_0”).AddLookupMenuItem2(ByVal MenuItemValue As String, ByVal MenuItemText As String, objEnvironment.CompanyId, objDataProcess.PageLanguage, objEnvironment.UserId)’,
- ‘objDataProcess.Field(“FieldName_0”).SetLookupMenuFilter(ByVal DataFilter As String, objEnvironment.CompanyId, objDataProcess.PageLanguage, objEnvironment.UserId)’,
- ‘objDataProcess.Field(“FieldName_0”).ClearLookupMenuItems(ByVal Optional ClearFieldValue As Boolean = True)’,
- ‘objDataProcess.Field(“FieldName_0”).GetSelectedText() As String’];
ObjEnvironment Main Functions #
- var EnvironmentProps = [‘objEnvironment.CurrentUser’,
- ‘objEnvironment.UserId’,
- ‘objEnvironment.CompanyId’,
- ‘objEnvironment.BranchCode’,
- ‘objEnvironment.CurrentUser.UserId’,
- ‘objEnvironment.CurrentUser.FullName’,
- ‘objEnvironment.CurrentUser.Gender’,
- ‘objEnvironment.CurrentUser.DateOfBirth’,
- ‘objEnvironment.CurrentUser.MobileNumber’,
- ‘objEnvironment.CurrentUser.ExtensionNumber’,
- ‘objEnvironment.CurrentUser.EmailAddress’,
- ‘objEnvironment.CurrentUser.ProfilePicture’,
- ‘objEnvironment.CurrentCompany’,
- ‘objEnvironment.CurrentCompany.CompanyId’,
- ‘objEnvironment.CurrentCompany.CompanyName’,
- ‘objEnvironment.IsPublicUser’,
- ‘objEnvironment.IsMemberOfGroup(ByVal GroupId As String) As Boolean’,
- ‘objEnvironment.GetSQLServerConnection2(ByVal ServerName As String) As SQLServerConnection’,
- ‘objEnvironment.GetOracleConnection2(ByVal ServerName As String) As OraConnection’,
- ‘objEnvironment.GetMySQLServerConnection(ByVal ConnectionString As String) As MySQLServerConnection’,
- ‘objEnvironment.CreateObject(ByVal TableName As String) As Object’,
- ‘objEnvironment.CreateNewPendingDataProcess(ByVal VersionName As String, ByVal WaitingForUser As String, ByVal WaitingForUserGroup As String, ByVal WaitingForBranch As String, ByRef IsCreated As Boolean) As DataProcess’,
- ‘objEnvironment.CreateNewStartedDataProcess(ByVal VersionName As String, ByRef IsCreated As Boolean, ByVal UserId As String) As DataProcess’,
- ‘objEnvironment.UpdateProcessData(ByRef objDataProcess As DataProcess) As Boolean’,
- ‘objEnvironment.SystemEventInsert2(ByVal EventLevel As String, ByVal EventSource As String, ByVal EventDescription As String) As ActionResult’,
- ‘objEnvironment.GetActionResult() As ActionResult’,
- ‘objEnvironment.GetPageSize() As Integer’,
- ‘objEnvironment.GetConfigValue(ByVal ConfigItem As String) As String’,
- ‘objEnvironment.SetConfigValue(ByVal ConfigItem As String, ByVal ConfigValue As String) As ActionResult’,
- ‘objEnvironment.GetNextSequence(ByVal SequenceId As String) As String’,
- ‘objEnvironment.ExtractContent(ByVal SearchString As String, ByVal PreString As String, ByVal PostString As String) As List(Of String)’,
- ‘objEnvironment.GetPagination(ByVal CurrentPageNumber As Integer, ByVal LastPageNumber As Integer, Optional ByVal JSFunctionName As String = “”) As String’,
- ‘objEnvironment.Notify(ByVal NotificationTitle As String, ByVal NotificationText As String, ByVal NotificationURL As String, ByVal GroupId As String, ByVal UserId As String, ByVal BranchCode As String) As Boolean’,
- ‘objEnvironment.NotifyBySMS(ByVal CustomerId As String, ByVal AccountNumber As String, ByVal ProductType As String, ByVal CategoryName As String, ByVal TransactionReference As String, ByVal SMSText As String, ByVal DateDurationToSend As String, ByVal FromDate As String, ByVal ToDate As String, ByVal TimeDurationToSend As String, ByVal FromTime As String, ByVal ToTime As String, ByVal GroupId As String, ByVal UserId As String, ByVal BranchCode As String) As Boolean’,
- ‘objEnvironment.SendSMS(ByVal CustomerId As String, ByVal AccountNumber As String, ByVal ProductType As String, ByVal CategoryName As String, ByVal TransactionReference As String, ByVal SMSText As String, ByVal MobileNumber As String, ByVal DateDurationToSend As String, ByVal FromDate As String, ByVal ToDate As String, ByVal TimeDurationToSend As String, ByVal FromTime As String, ByVal ToTime As String) As Boolean’,
- ‘objEnvironment.NotifyByEmail(ByVal CustomerId As String, ByVal AccountNumber As String, ByVal ProductType As String, ByVal CategoryName As String, ByVal TransactionReference As String, ByVal SenderTitle As String, ByVal MessageSubject As String, ByVal MessageBody As String, ByVal MessageCC As String, ByVal MessageBCC As String, ByVal DateDurationToSend As String, ByVal FromDate As String, ByVal ToDate As String, ByVal TimeDurationToSend As String, ByVal FromTime As String, ByVal ToTime As String, ByVal GroupId As String, ByVal UserId As String, ByVal BranchCode As String) As Boolean’,
- ‘objEnvironment.SendEmail(ByVal CustomerId As String, ByVal AccountNumber As String, ByVal ProductType As String, ByVal CategoryName As String, ByVal TransactionReference As String, ByVal SenderTitle As String, ByVal MessageSubject As String, ByVal MessageBody As String, ByVal MessageTo As String, ByVal MessageCC As String, ByVal MessageBCC As String, ByVal DateDurationToSend As String, ByVal FromDate As String, ByVal ToDate As String, ByVal TimeDurationToSend As String, ByVal FromTime As String, ByVal ToTime As String) As Boolean’,
- ‘objEnvironment.ExecuteAPI(ByVal ProxyId As String, ByVal RequestResource As String, ByVal RequestDataFields As List(Of String), ByRef ExceptionDetails As String) As String’,
- ‘objEnvironment.GetNewId() As String’,
- ‘objEnvironment.CheckAgainstValidationRule(ByRef StringToCheck As String, ByVal ValidationRuleName As String) As Boolean’,
- ‘objEnvironment.ConvertStringToDate(ByVal DateFormat As String, ByVal strDate As String) As Date’,
- ‘objEnvironment.GetAttachmentFile(ByVal AttachmentReference As String) As AttachmentFile’,
- ‘objEnvironment.GetDataSet(ByVal ParamArray ColumnNames As String()) As DataSet’,
- ‘objEnvironment.AddRecordToDataSet(ByRef objDataSet As DataSet, ByVal ParamArray RecordItems As String())’,
- ‘objEnvironment.GetJSONItemValue(ByVal JSONString As String, ByVal ItemName As String) As String’,
- ‘objEnvironment.GetXMLItemValue(ByVal XMLString As String, ByVal ItemName As String) As String’,
- ‘objEnvironment.GetXmlDocument(ByVal XMLString As String) As XmlDocument’,
- ‘objEnvironment.GetOCRDocument(ByVal XMLString As String) As OCRDocument’,
- ‘objEnvironment.GetCivilianDetails(ByVal XMLString As String) As CivilianDetails’,
- ‘objEnvironment.GetCompanyDetails(ByVal XMLString As String) As CompanyDetails’,
- ‘objEnvironment.GetIndividualCompanyDetails(ByVal XMLString As String) As IndividualCompanyDetails’,
- ‘objEnvironment.GetAnaMeenBeneficiaryData(ByVal JSONString As String) As AnaMeenBeneficiaryData’,
- ‘objEnvironment.SaveAttachmentFile(ByVal FileName As String, ByVal FilBinaryeData() As Byte, ByRef ImageDimensions As String, ByRef ErrorDescription As String) As String’,
- ‘objEnvironment.ConvertNumberToTextEN(ByVal NumberToConvert As Int64) As String’,
- ‘objEnvironment.ConvertNumberToTextAR(ByVal NumberToConvert As Int64) As String’,
- ‘objEnvironment.ExecuteQuery(ByVal ServerName As String, ByVal SelectStatement As String) As List(Of DataItem)’,
- ‘objEnvironment.ExecuteInsertQuery(ByVal ServerName As String, ByVal InsertStatement As String) As ActionResult’,
- ‘objEnvironment.ExecuteUpdateQuery(ByVal ServerName As String, ByVal UpdateStatement As String) As ActionResult’,
- ‘objEnvironment.ExecuteDeleteQuery(ByVal ServerName As String, ByVal DeleteStatement As String) As ActionResult’,
- ‘objEnvironment.ExecuteSelectQuery(ByVal ServerName As String, ByVal SelectStatement As String) As DataSet’,
- ‘objEnvironment.ExecuteSelectSpecial(ByVal ServerName As String, ByVal SelectStatement As String) As String’,
- ‘objEnvironment.ExecuteStoredProcedure(ByVal ServerName As String, ByVal ProcedureName As String, ByVal ProcedureParams As List(Of String)) As Object’,
- ‘objEnvironment.GetOpenAPIResponseFromXML(ByVal XMLString As String) As OpenAPIResponse’,
- ‘objEnvironment.GetOpenAPIResponseFromJSON(ByVal JSONString As String) As OpenAPIResponse’,
- ‘objEnvironment.Encrypt(ByVal EncryptionKey As String, ByVal DataString As String) As String’,
- ‘objEnvironment.GetEncryptedTransactionReference(ByVal EncryptionKey As String) As String’,
- ‘objEnvironment.GetOFSEnquiryResponse(ByVal EnquiryResponse As String) As OFSEnquiryResponse’,
- ‘objEnvironment.GetOFSXMLEnquiryResponse(ByVal EnquiryResponse As String) As OFSEnquiryResponse’,
- ‘objEnvironment.GetOFSEnquiryResponseFromXMLAPI(ByVal XMLString As String) As OFSEnquiryResponse’,
- ‘objEnvironment.GetOFSEnquiryResponseFromJSONAPI(ByVal JSONString As String) As OFSEnquiryResponse’,
- ‘objEnvironment.GetOFSXMLEnquiryResponseFromXMLAPI(ByVal XMLString As String) As OFSEnquiryResponse’,
- ‘objEnvironment.GetOFSXMLEnquiryResponseFromJSONAPI(ByVal JSONString As String) As OFSEnquiryResponse’,
- ‘objEnvironment.GetOFSTransactionResponseFromXMLAPI(ByVal XMLString As String) As OFSTransactionResponse’,
- ‘objEnvironment.GetOFSTransactionResponseFromJSONAPI(ByVal JSONString As String) As OFSTransactionResponse’,
- ‘System.Diagnostics.Debugger.Break()’];
Scripting (Javascript) #
In version JAVASCRIPT you can write any JAVASCRIPT code. To call it for any field for example for a button. Go to the field properties, In OnClick or OnChange box write the JAVASCRIPT function name in this formula: Suppose you have function called adjustSectionHeights, to call it just write it with (). So, in OnClick it will be called like this: adjustSectionHeights(). In general, functionname().
Scripting (CSS) #
In version CSS you can write any CSS code. To call it for any field for example for a button. Go to the field properties, In OnClick or OnChange box write the CSS function name in this formula: Suppose you have a function called center, to call it just write it without any extra thing. So, in OnClick it will be called like this: center. In general, function name.
Workflow Designer #
The workflow designer is related to the version designer, it is used to make an action to workflow buttons that is in the designer. Using workflow, we can make decision by making a map for a specific case.
- Workflow main properties are described in following figure:
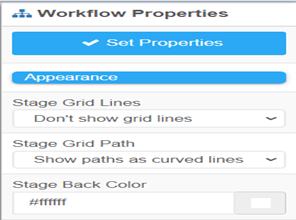
– Stage Grid Lines: Yes or No.
– Stage Grid Path: Show paths as curved or straight lines.
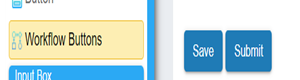
- Inside Workflow Version, there are two main fields: Starting point and Decision. We see them as buttons in Version Viewer.

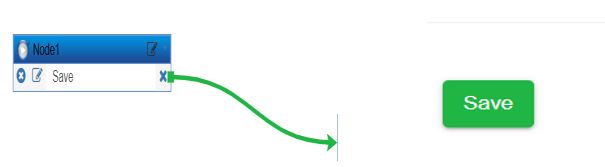
– For instance, if you want to add a Starting Point workflow, the default action is “Save and Submit.” However, user has the flexibility to modify or remove either of them. It’s not necessary to keep both, and any change made here will promptly reflect in the version viewer.
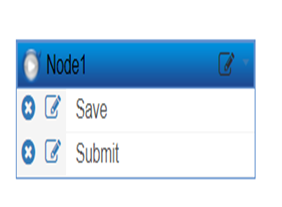
– To change starting point case click on edit, and in properties put your case value.
– To change Case title for example for Submit case. Next to it there is edit pen just click on it and all case properties will appear and change any thing you want as we explained previously in Fields properties.
– Immediately in Version Viewer the workflow buttons will be added when using workflow buttons field.
- The Workflow starts with a starting point, after that, the queues and at the end there is a decision.
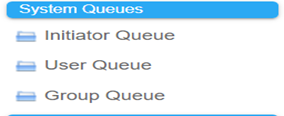
- System Queues: Initiator queue, user queue, and group queue. In the group queue, there is a field called branch code: in this field if user put (I) it means send this process to the manager group that belongs to him (Initiator).
- Suppose the line color in Workflow is changed from the properties. Consequently, the button related to this line will be promptly changed in the Version Viewer.
- In a simple example, let us consider a queue scenario where a specific user is not supposed to make the decision. Instead, the decision should be made by the user selected from a dropdown list. To achieve this:
– In Version Viewer put drop-down list, and from generated lookup menu use all platform users:

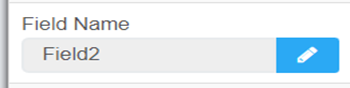
– Next, know the drop-down list name, it will be shown in Field name:
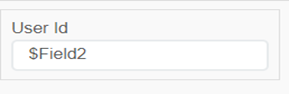
– Finally, in the workflow queue, open its properties and in User id put $FieldName as shown in the figure:
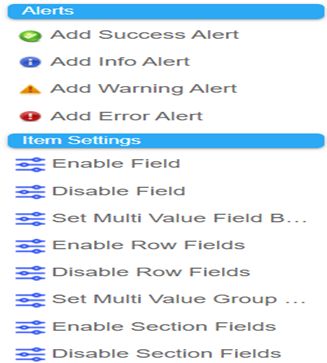
- Workflow efforts general Alerts and settings to make dealing with fields, rows and sections looks easier. All Alerts and are shown in the following figure:
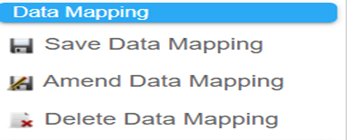
- In workflow there is also Data Mapping it includes: Save Data mapping, Amend Data Mapping (Update), and Delete Data Mapping. Using Data Mapping user can make mapping between specific fields in the design with a database in the system. To understand Data Mapping see the following scenario:
– Suppose there exists a table named “Training,” which contains fields for Customer ID and Customer Name.
– In Version Designer, add two text fields to make mapping.

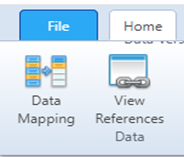
– To create Data mapping, from Home Menu bar Go to Data Mapping Icon, click on it so a new screen will be opened.
– The following screen appears, in it you must write the name of the data mapping and choose a table that already exists. In our case it is called Training.

– After that, click on Add Data mapping, so a new tab will appear. It contains template fields and with what fields you will connect them. (Mapping using Field ID (name) you will put it in version Field name). Then, click on save.

– After Data Mapping is created, go to Version Workflow, drag, and drop, for example Save Data Mapping box. When click on edit pen, two main properties will be shown:
• Mapping Name: (Write the name of the mapping you created).
• Display Errors: It displays error message if something is wrong (It take two value (Y OR N) Y for Yes, N for No, or (TRUE OR FALSE)).
– Now if user goes to Version Viewer and put Workflow button, any added item will be immediately saved in the template (Database) as show in the next figures for version viewer and Database.


Same thing is done for both Amend and Delete Data Mappings.
- The last thing that Workflow efforts is Business Rule. Like other boxes when clicking on it, its different properties will appear.
– To see Business Rule, from Home Menu bar Go to Business Rules Icon, click on it so a new screen will be opened.

– The following screen will be opened, in it write the name for the Business Rule.
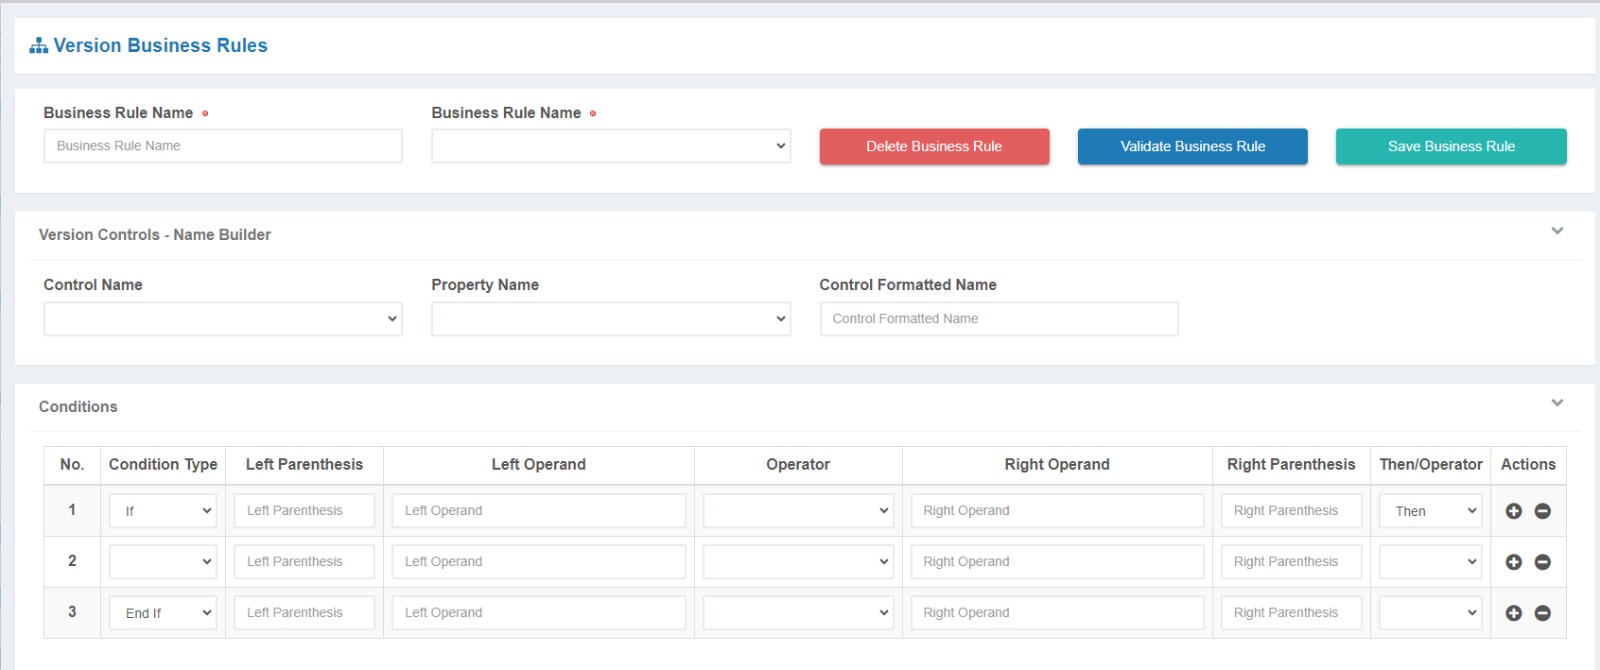
NOTE: Through this screen, conditions and rules for any necessary case can be established. Additionally, the code for the created case can be displayed by clicking on the Validate Business Rule Icon after conditions have been set.
After all Workflow features are explained, let us have a look at example contains Workflow, Version Designer and Process.
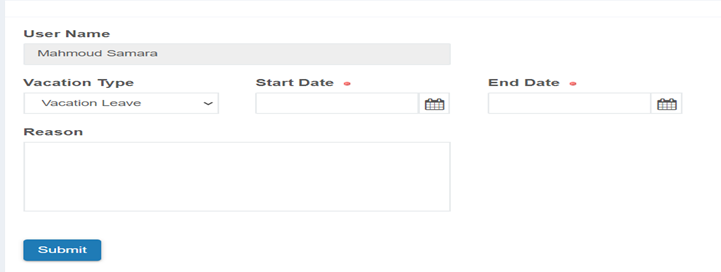
The scenario chosen is the (Leave Request scenario), such as for vacations, sick days, family excuses, and others.
– Firstly, a simple design for the scenario will be created from Version Viewer, the design is show in following figure. In the version properties, “IS data process” will be set to YES. Following this, the process type can be chosen after the process has been created. Instructions on how to create the process are detailed in section 6.4.
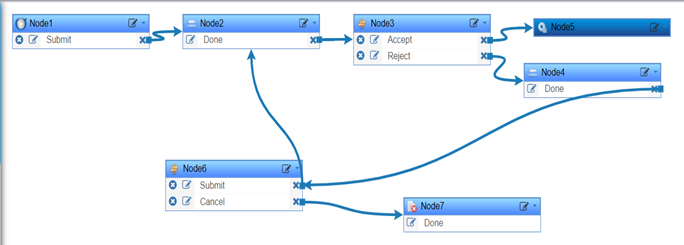
– Now, the Workflow design will be created as depicted in following figure:
• Node1 is the starting point, shown as the Submit button in the previous design.
• Node2 corresponds to the Admin query, indicating that the request will be forwarded to the Administrator for the Employee’s request to either Accept or Reject it.
• If accepted, the process concludes. If rejected, the request will be returned to the Employee, who then has two options: to Submit again, leading back to the Admin, or to Cancel, concluding the scenario.
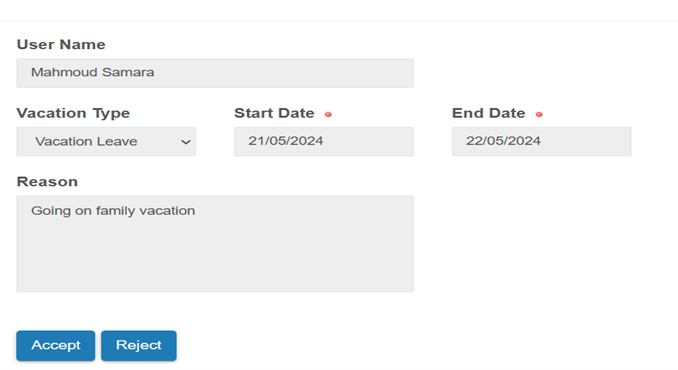
– After the user fills in information and clicks on submit, the following message will appear, and the request will be sent to the Admin.

– In the admin page he can accept or reject, and we explained the scenario depending on each choice.
That is the workflow in general and how it works with data processing and its different properties.
In the DOCUMENT FILLER, both PDF documents and Word documents can be created. The primary settings and properties are shared between them. However, the difference is in the code and how to deal with the fields.
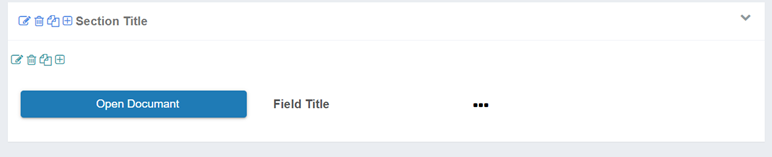
To create document design, from the main bar select Document Filler and then Document Filler option as shown in the following figure:

After clicking on Document Filler, the document screen will appear as following:
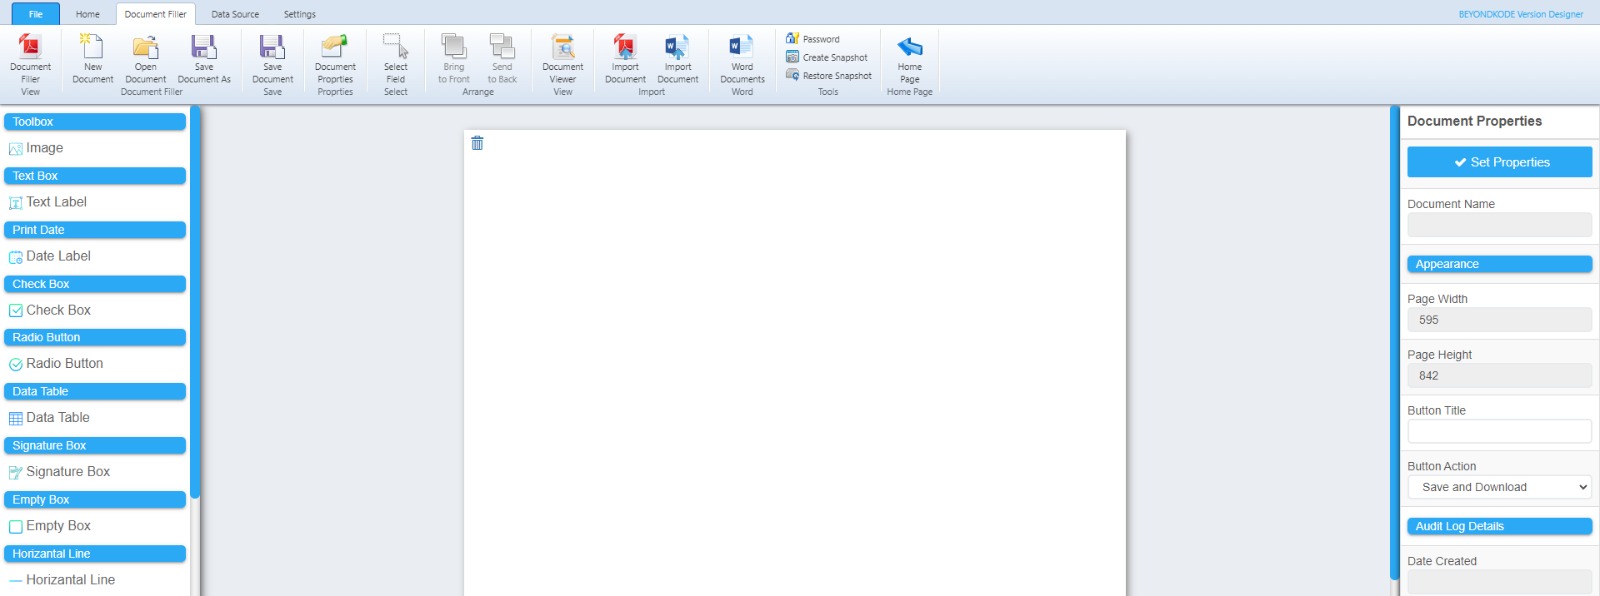
Form the previous figure we can implement and design the document as we want for both RDF and Word, by adding:
- Image.
- IT Text Label.
- Date Label.
- Check Box.
- Radio Button.
- Data Table.
- Signature Box.
- Empty Box .
- Horizontal Line.
- Vertical Line.
- Empty Page.
PDF Document #
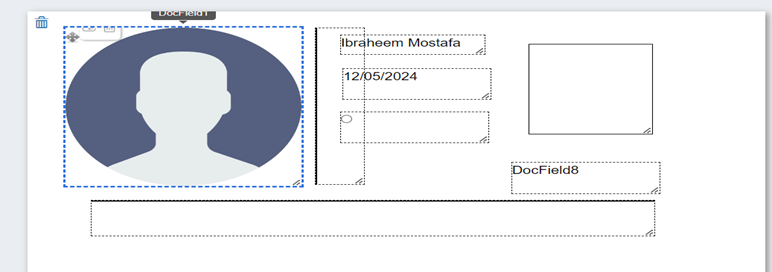
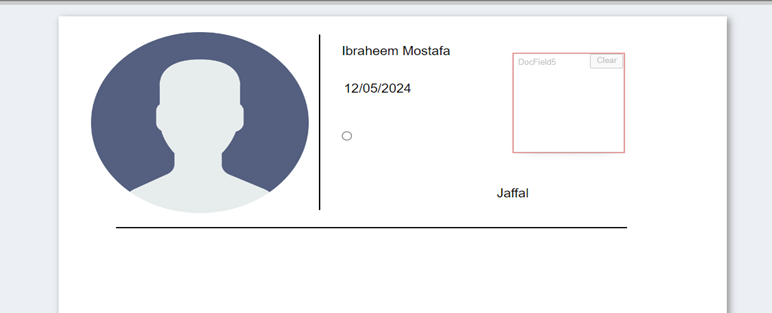
For example, let us consider this simple design created for a PDF report:
NOTE: Do not forget to save the document after finished.
To see the document and deal with it Open the designed document from the version viewer: The simple design includes a button that, when clicking, opens the document.
For the main code it is explained as the following:
public bool OnLoad(dynamic objDataProcess, dynamic ValidationResults, dynamic objEnvironment)
{
      bool Ret = true; string ErrorDescription = "";
      dynamicobjDocument= objDataProcess.GetType().GetMethod("GetDocument").Invoke(objDataProcess,new object[] { "TariqTestDoc", Ret, ErrorDescription, objEnvironment});
      objDocument.SetFieldValue("DocField8","Jaffal");
      objDataProcess.ShowDocument(objDocument, "Field2", "0"); return Ret;
}
TariqTestDoc = Your document name
objDocument.SetFieldValue(“DocField8″,”Jaffal”); à display “Jaffal” in the DocField8
After making the design and add the code to button @OnLoad, now if click on button the document will be shown:
The data from fields can also be read using:
objDataProcess.Field["FieldName"].FieldValue; then we use as previous for example:
String senderName = objDataProcess.Field["FieldSenderName"].FieldValue;
objDocument.SetFieldValue("DocField8",senderName);
The button appearing at the end of the document can be edited.

By going from Document Filler to Document Properties and edit the Button Action as shown in the figure below:

Word Document #
For the Word document it is the same as PDF document but there are some differences. For starting, the creation of the Word document follows the same process as for the PDF, but the method in code is different, as shown in the following line of code.
dynamic objDocument = objDataProcess.GetType().GetMethod("GetWordDocumentGenerator").Invoke(objDataProcess, new object[] { "RequirementsReport2", Ret, ErrorDescription, objEnvironment});With this line, a documentFiller object will be generated, which we can utilize to access and manipulate the document file.
For example, let us consider this simple design created for a document file:
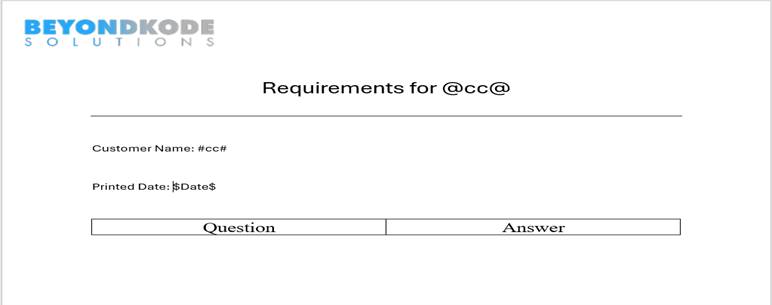
Note that special characters are used between the words, such as $Date$, due to the representation of the Word document in XML format, where consecutive words are not guaranteed. Additionally, it is important to consider that if a word is too long, the likelihood of it being replaced may decrease accordingly.
Now, after designing a document file, we can replace these values with any desired value using the documentFiller object created, following the same logic as with the PDF. For example, consider the following line of code:
objDocument.ReplaceText("#cc#", "YourValue");Or it can be read from the fields and then inserted into the doc file as follows:
String CustomerName = objDataProcess.Field["FieldCustomerName"].FieldValue;
objDocument. ReplaceText ("#cc#", CustomerName);
Another way is to read the data from the database then insert it into the doc file.
String query = " Select CustomerProfile.ENGFirstName CustomerProfileENGFirstName,CustomerProfile.ENGFamilyName CustomerProfileENGFamilyName From dbo.CustomerProfile Where  (QuestionAnswer.CustomerCode = 'CC0026') "
dynamic
FilteredRows = objEnvironment.ExecuteSelectQuery("Server1", query);

String name = FilteredRows.Tables[0].Rows[0]["CustomerProfileENGFirstName"].ToString() + " " + FilteredRows.Tables[0].Rows[0][
    "CustomerProfileENGFamilyName"].ToString();
objDocument.ReplaceText("#cc#", name);
Other thing to take note on is when working with doc files the tables can be filled with data using the method (AddRowToDateTable) which adds rows to your table but to access this table you need to give it a name by going to table properties then to the Alt text tap and in the title section we specify the table name as shown in the following figure.
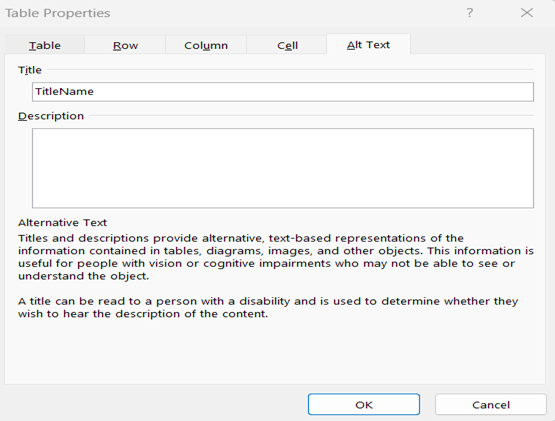
Now after giving our table a name, we can add rows to the table using the following code snippet:
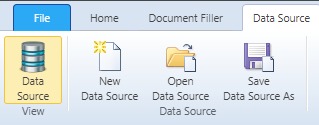
objDocument.AddRowToDateTable("TitleName", column1 Data, column2 Data, ...........);Data Source is the third icon in main menu bar, in this area user can see all data sources are made, create new templates, and execute the data source as table with its different properties.
- To view DATA SOURCE, Go to Data Source Icon from Data Source main menu. In addition, you can see data sources that are already available from open data source.
- After clicking on Data source, all system templates will be shown, and you can drag and drop any template you want to see its different operations and properties.
- For example, let us choose a temple called Employee as shown in the figure. In each template we can make different operations:
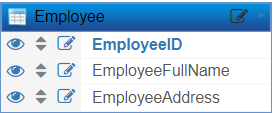
– Next to each field, there are icons (eye, arrows and edit) From left to right: If the eye is blue, it means show this field is shown in the table, if not blue it means do not show this field in the table.
– The second Icon is the Order by icon, when clicking on it, it has two main options (A to Z) means order by the selected field Ascending. (Z to A) means order by the selected field Descending. Finally, edit button to show the properties for each field:
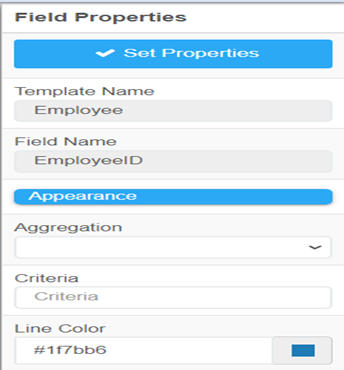
• Criteria it is where statement. Like, put inside it, “Ahmad” will be written to show only the users whose name is Ahmad.
• Aggregation: it has many options to do on the selected field for example, Sum, Average, Min, Max, and count.
• Show the table all columns and values: This can be done by clicking on Execute as Table Icon from DATA SOURCE main menu. The table will be shown depending on the properties the user has put as we described before, like order by, what to show, where statement …. etc.
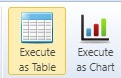
• In execute page The SQL query will be written depending on the cases. For example, show the table data and order it depend on EmployeeID Ascending:
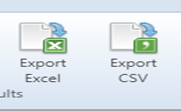
Select Employee.EmployeeID EmployeeEmployeeID,Employee.EmployeeFullName EmployeeEmployeeFullName,Employee.EmployeeAddress EmployeeEmployeeAddress From dbo.Employee Order By EmployeeEmployeeID Asc- You can export the selected table Data as Excel or CSV file. In Data Source menu bar, first click on Execute as Table Icon then you can click on Export Excel or Export CSV.
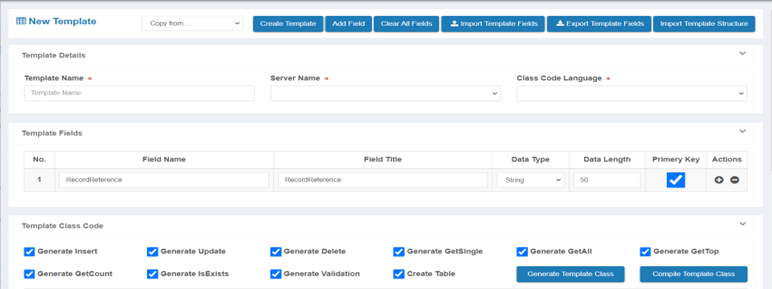
- Finally, to create a New Template, first go to the Create Template Icon from the Data source menu and click on it.
– The following screen will be opened, in it you must write the template name (template name must be unique it is not accepted to have two tables with the same name in the same database), Server name is (Server 1), code it is VB or C#. Template fields you can put all fields you want and choose which one is the primary key. After filling in all information click on Generate template class, then compile template class. Finally, click on Create template from top menu.
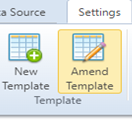
– To edit the created template, From Setting menu, click on Amend template, search for your template, and edit what you want. Also, from settings menu you can Create template in the same way.
The data type cannot be edited using Amend template. The only one who can edit the type is the one who has access to the server.
- After the template has been created, the main operations that can be performed on it include viewing the template, inserting new data, updating existing data, and deleting existing data if necessary.
The platform gives user the option to generate codes and designs for the created template to immediately Insert, Update, and Delete.
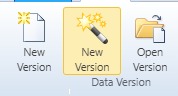
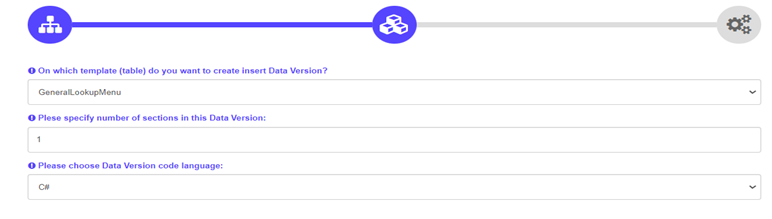
1– From Home menu bar, select New Version, click on it and the following screen will appear.

2– Let us for example choose Insert, choose the template you created, and then select the code language you want. Then, click next. Finally, click Finish.
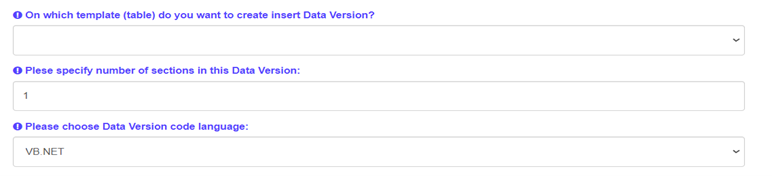
3– The template design and code will be generated and ready to fill data when you click on version viewer.
Language #
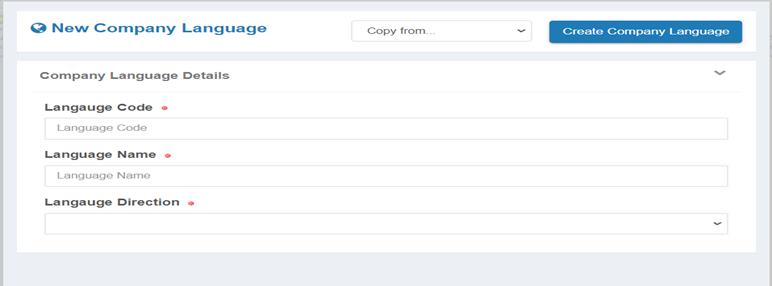
From the settings menu bar you can add new language and Amend an existing language.
To create new language, click on New language from menu bar, and the following screen will appear. Put language code and name, Language direction is (Left to Right or Right to Left).
Lookup #
As we previously described, a drop-down list can be filled in manually, or by generating lookup menu. The platform has a templated called (GeneralLookupMenu) in this template add lookup menu values, but first generate lookup menu.
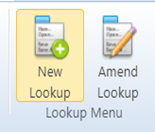
– From the settings menu bar click on New lookup.
– The following screen appears, you must fill the Fields and then create the new Lookup.
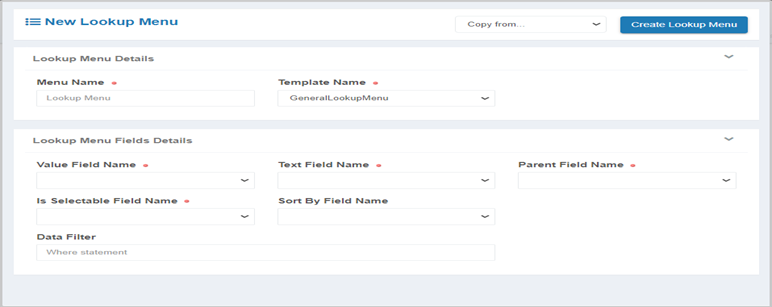
• To use the exist template, put template name is GeneralLookupMenu.
• Value Field Name and Text Field Name are filled depending on the created template.
If GeneralLookupMenu is used then Value Field Name is (ItemValue), Text Field Name (we can add values in English, so Text Field Name is ENGItemText, or Arabic language so Text Field Name is ARBItemText.
• Data Filter: add where statement to explain where this menu will be used. Where (Column name in the template) = ‘Column name in the templatewe want to use menu in it.’ For example, we used GeneralLookupMenu so column name in it is MenuName, so Where MenuName = ‘QuestionGroupType’.
After creating the new lookup menu, go to version designer and from new Version choose Insert lookup menu template:
After that you can start filling the menu values in the following screen:

Finally, to add the generated lookup menu values to the drop-down list:
Go to the field called drop-down list properties and from choose your Lookup menu.
API #
To Create API, choose form sittings New API Proxy as shown in the figure below:

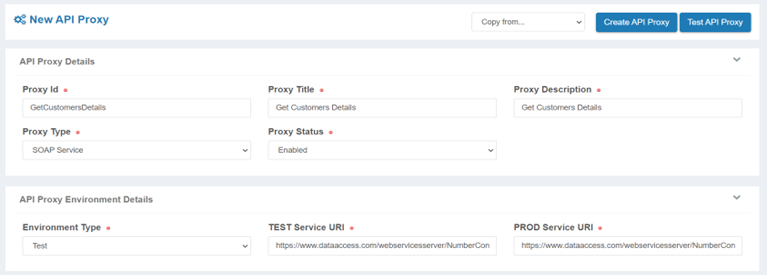
When clicking on the New API Proxy the screen shown below will appear:
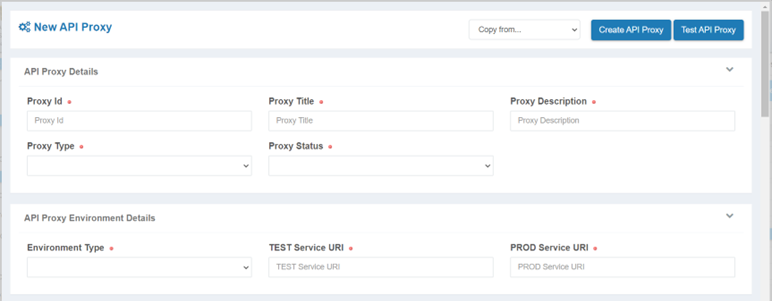
From this screen we can define the properties for the API that we want to make it:
In API Proxy Details section:
- Proxy Id: The ID of API.
- Proxy Title: The Title of the API.
- Proxy Description: The Description of API.
- Proxy Type: Type of API [SOAP Service / REST Service / Custom Code] and based on the Proxy Type the API Proxy Request Details section will change to fit with the type of API.
- Proxy Status: [Enabled/ Disabled].
- Enabled: We can use it on platform and in third party.
- Disabled: We cannot use it in platform or in third party, (its disabled).
In API Proxy Environment Details section:
- Environment Type: [Test / Production].
- TEST Service URI: URI for the API in Test environment.
- PROD Service URI: URI for the API in Production environment.
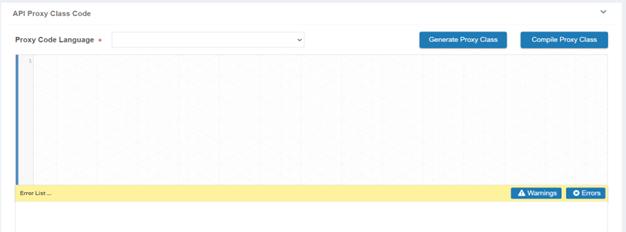
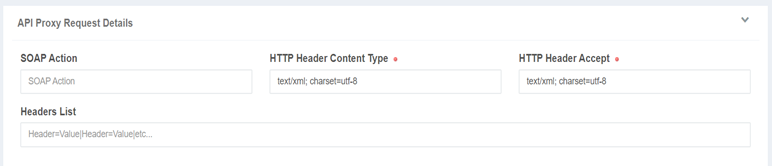
In API Proxy Request Details:
- Proxy Type (SOAP Service):

- Proxy Type (REST Service):

- Proxy Type (Custom Code):
- In the Proxy Code Language, choose the language of Custom Code for API that we want to build [C#.NET / VB.NET].
In API Proxy Security Details:

- Security Protocol.
- Security Token.
- Network Credential Username.
- Consumer Key.
- Network Credential Password.
- Consumer Secret.
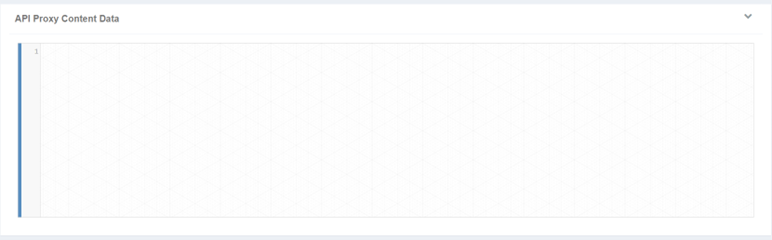
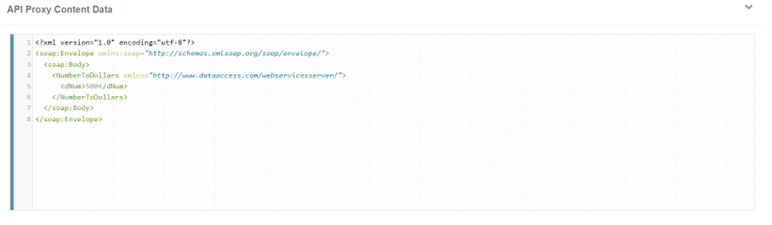
In API Proxy Content Data:
Here we can see the content from the API.
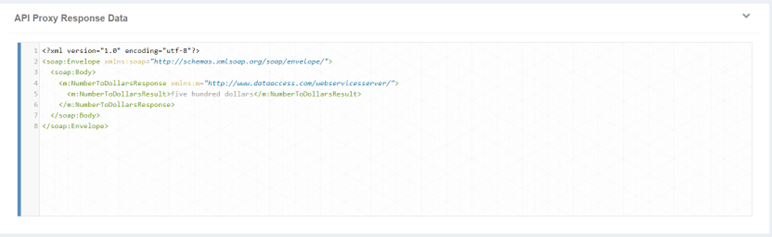
- In API Proxy Response Data:
Here we can see the response from the API.
Practical example:
We want to test public soap API in our platform by using the following link:
We will use the NumberToDollars API from the link, the screen will be as the following after filled the data:
Click on the Test API button and the data appears in the API Proxy Response Data section.
To use public soap API in our platform by using the same link above:
- We make the same configuration as in test example but here we want to change the following:
- Environment Type we put it Production.
- In API Proxy Content Data we change this line:
<dNum>500</dNum> to this <dNum>$NumberToConvert$</dNum>
- After that click on create API button and the successful message appear:

Now if user go to the Amend API Proxy from the setting section:

The created APIs are shown, click on the Amend button to edit the API.

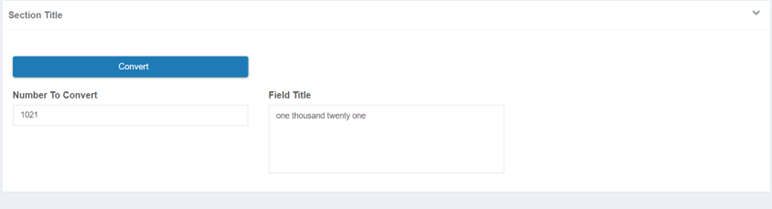
To use the NumberToTextConverter API in our platform, lets design the following screen:

Then go to code to make it work with this design:
We will use objEnvironment.ExecuteAPI function to deal execute the API as the following:
using Systen;
using System.Collections.Generic;
using Newtonsoft.Json;
nanespace nsTTTP
{
    public class elsTTIP
    {
        public bool OnConvert(dynamic objDataProcess, dymanic ValidationResults, dynanic objEnvirontent)
        {
            bool Ret . true;
            string ExceptionDetails . "":
            Listestring> RequestDataFields. new Listestring>();
            RequestDataFields.Add("NumberToComvert .* + objOataProcess.Field["Field2"].Fieldvatue);
            string response . objEnvircement. ExecuteAPI("NurberToText", "", RequestDatafields, ref ExceptionDetails);
            objDataProcess.Field["Field4"].FieldValue . objEnvirorment.GetXMLItenValue(response, 'n:NumberTowordsResult");

        return Ret;
        }
    }
}
Do not forget to put the @OnConvert in the Convert button and then run the program and it will be like this:
Data Process #
To create a new data process, do the following:
1- From settings menu bar click on New process type.
2- The following screen will appear, fill the Fields, and then create the new process type.
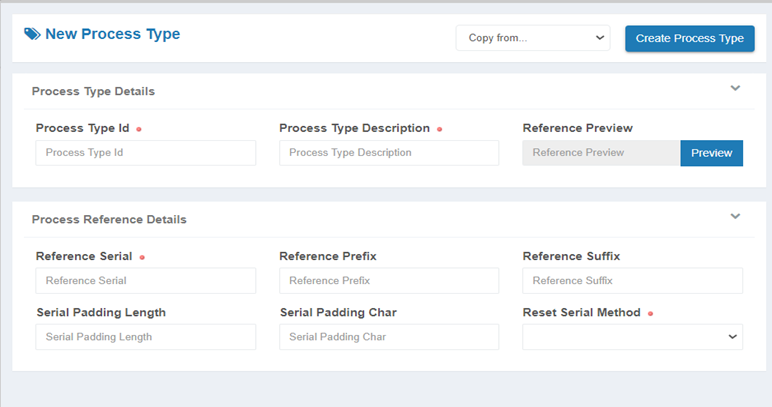
• Reference Serial is the initial number to start from it.
• Reference Prefix and Suffix are characters. Sometimes you should add a prefix or suffix inside quotations (‘’) because it may take it as DateTime.ToString() => m stands for month; y stands for year and so on.
• Serial Padding Char for example is 0, if we put serial padding length is 4. So, serial char will be shown like 0000.
• Reset Serial Method: (Yearly, monthly, daily, never). The effect will be shown in Reference Prefix. For example, my Reference Prefix was (RM) and I put Reset Serial Method to be daily, so the new Reference Prefix (‘RM’yyyyMMdd).
• Reference Review is to see how the serial will be before creating the process.
• The following figure shows an example of creating a process type:

Sequence #
In some cases, especially for templates user needs to make the primary key auto fill, to do this we have to make at first new sequence:
1- From the settings menu bar click on New Sequence.
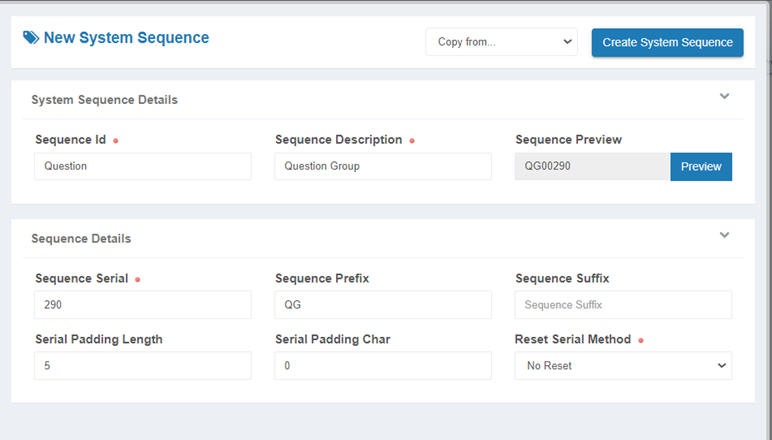
2- The following screen will appear, you must fill the Fields and then create the new Sequence.
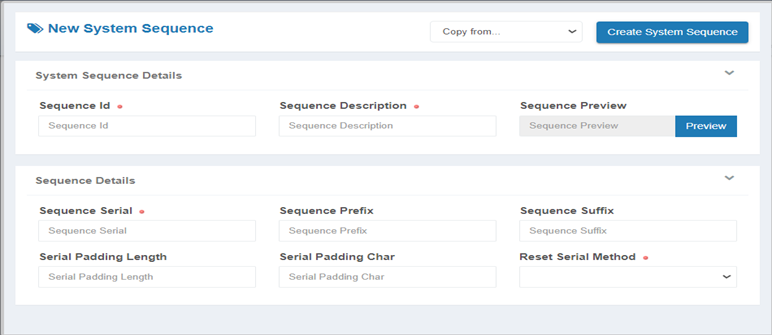
• Reference Serial is the initial number to start from it.
• Reference Prefix and Suffix are characters. Sometimes you should add a prefix or suffix inside quotations (‘’) because it may take it as DateTime.ToString() => m stands for month; y stands for year and so on.
• Serial Padding Char for example is 0, if we put serial padding length is 4. So, serial char will be shown like 0000.
• Reset Serial Method: (Yearly, monthly, daily, never). The effect will be shown in Reference Prefix. For example, my Reference Prefix was (RM) and I put Reset Serial Method to be daily, so the new Reference Prefix (‘RM’yyyyMMdd) .
• Reference Review is to see how the serial will be before creating the process.
• The following figure shows an example of creating a Sequence:
Now to use the created Sequence in a specific field in database, In OnLoad function (initial Function) put the following code:
objDataProcess.Field["Fieldname"].FieldValue = objEnvironment.GetNextSequence("SequenceId");Temenos is a widely used core banking system designed to meet the needs of banks of all sizes, providing them with a flexible and scalable solution for managing their operations. In Temenos T24, there are two main modules, the BGM (Batch Generation Module) File and the Standard Selection File. They play critical roles in defining how data is processed and managed.
To make connection with Temenos, in the platform we make OFS (Open Financial Service) Source, it is integration between Temenos and the platform.
OFS Source
First, we need to know that Versions in T24 refer to configurations or views of a table/application. To access a version, the syntax is TABLE_NAME,Version_Name. For example, CUSTOMER,Input would be used to enter the ‘Input’ version of the ‘CUSTOMER’ table.
after making any screen for data entry or transaction processing, two primary buttons are added: Commit and Validate.
- Commit: Save the entered data to the table (Submit).
- Validate: It is used to verify the accuracy and completeness of the entered data. It checks for any errors or missing information.
In the platform we make OFS (Open Financial Service) Source, it is integration between Temenos and the platform.
To create a new OFS Source, do the following:
- From settings menu bar click on New OFS Source.
- When the screen will appear, fill the Fields, and then create the New OFS Source.
- OFS Source Details
- OFS Id
- OFS Title
- OFS Type: Transaction ( Insert update delete) / Enquiry (Select)
- Enquiry Name
- Application Name: table name
- Version Name
- Function Type:
- Transaction Type: Validate / Process
- OFS Status: Enabled / Disabled

- OFS Source Environment Details
- T24 Username: Temenos username
- T24 Password: Temenos Password
- Company Code.
- No. Of Authorizers.
- GTS Control: For validation to the message. (In these days it is not days)
- Replace Existing Record: YES (Delete the full row and update the new field value but the other fields will be empty since they are not updated), NO (Update the selected field only others remain the same)

- OFS Source JMS Details
- JMS Url: t3/stamp, Temenos T24 can operate on different middleware environments like WebLogic and JBoss.
- Web Logic (Oracle):
- Protocol: t3, this protocol depends on server name not the IP address.
- Configuration: username, password, connection factory, request queue, reply queue, and time-out settings.
- JBoss:
- Protocol: stamp, takes either server name or IP address.
- Configuration: similar settings as Web Logic.
- Web Logic (Oracle):
- JMS Username.
- JMS Password.
- JMS Connection Factory.
- JMS Request Queue: JMS/Queue name.
- JMS Reply Queue.
- JMS Consumer Timeout: Timeout for the response.
- JMS Url: t3/stamp, Temenos T24 can operate on different middleware environments like WebLogic and JBoss.
